So, you’ve decided to give your stairs a stunning makeover by installing hardwood flooring. Good choice! Not only will it add a touch of elegance to your home, but it will also increase its value. But where do you begin? Don’t worry, we’ve got you covered. In this article, we will guide you through the step-by-step process of installing hardwood flooring on stairs, ensuring that you achieve professional-looking results. From prepping the stairs to installing the hardwood planks and adding the finishing touches, you’ll have all the information you need to transform your stairs into a beautiful focal point of your home. Get ready to make a statement with your new, stylish staircase!
Understanding Hardwood Flooring on Stairs
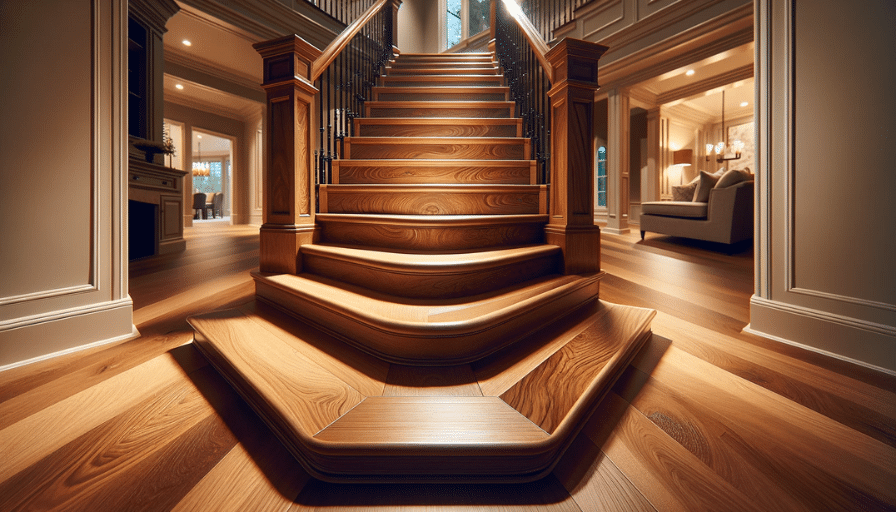
Installing hardwood flooring on stairs can transform the look and feel of your home. Not only does it add a touch of elegance and sophistication, but it also offers durability and longevity. Before diving into the installation process, it’s important to understand the fundamentals of hardwood flooring, the benefits it brings to stairs, and how to estimate the costs involved.
Fundamentals of Hardwood Flooring Installation
To successfully install hardwood flooring on stairs, you need to have a basic understanding of the installation process. This involves knowing the different types of hardwood available, such as solid hardwood and engineered hardwood, and their suitability for stairs. Understanding the necessary tools and materials required, as well as the techniques for measuring, cutting, and securing hardwood planks, is crucial for a seamless installation.
Benefits of Installing Hardwood Flooring on Stairs
There are numerous benefits to choosing hardwood flooring for your stairs. Firstly, hardwood adds a timeless and luxurious aesthetic to any space. It can elevate the overall appearance of your staircase and complement the existing décor. Additionally, hardwood is incredibly durable and long-lasting, meaning it can withstand heavy traffic and everyday wear and tear. This makes it an excellent choice for stairs, where foot traffic is often high. Hardwood is also easy to clean and maintain, making it a practical option for those seeking a low-maintenance flooring solution for their stairs.
Estimating the Costs of Hardwood Flooring on Stairs
Before starting any home improvement project, it’s important to have a clear idea of the costs involved. When it comes to hardwood flooring on stairs, several factors can influence the overall cost. These include the type and quality of the hardwood, the size and shape of the stairs, and the complexity of the installation process. It’s crucial to take accurate measurements and consult with professionals or reputable suppliers to get an estimate of the materials, labor, and any additional expenses that may arise during the installation.
Choosing the Right Hardwood Flooring
Selecting the right hardwood flooring for your stairs is essential to achieve the desired result. There are various factors to consider when making your decision, including the type of hardwood, the color, the finish, and the overall style you want to achieve.
Examining Different Types of Hardwood
Hardwood for stairs is available in different types, such as oak, maple, cherry, and walnut, each with its unique characteristics. Oak is a popular choice due to its durability and versatility. Maple offers a light and contemporary look, while cherry brings warmth and richness. Walnut is known for its dark and dramatic appearance. By examining the different types of hardwood, you can determine which best suits your personal preferences and the style of your home.
Analyzing Factors That Affect Hardwood Selection
Besides considering the type of hardwood, there are other factors to analyze when selecting the right flooring for stairs. The hardness of the wood, its resistance to moisture and scratches, and its ability to withstand heavy foot traffic should be taken into account. Additionally, considering the color and finish options available will help you choose a hardwood that complements your staircase and enhances the overall ambiance of your home.
Comparing Prefinished vs. Unfinished Hardwood for Stairs
When it comes to hardwood flooring on stairs, you have the choice between prefinished and unfinished options. Prefinished hardwood is already sanded, stained, and coated with a protective finish before installation. This makes it easier and quicker to install, as there is no need for sanding or finishing during the installation process. Unfinished hardwood, on the other hand, is sanded and finished on-site, allowing for a more customizable look and feel. Understanding the differences between these options can help you make an informed decision based on your preferences, budget, and timeline.
Tools and Materials Needed
Having the right tools and materials is crucial for a successful hardwood flooring installation on stairs. Here is a list of the essential tools and materials you will need:
Listing the Tools for Installation
- Tape measure
- Chalk line
- Circular saw
- Screwdriver and/or drill
- Hammer
- Pneumatic nailer
- Level
- Miter saw
- Pry bar
Describing the Necessary Materials
- Hardwood flooring planks
- Stair nosing
- Adhesive and/or nails
- Underlayment (if necessary)
- Wood filler
- Sandpaper
- Finish (sealant or stain)
Exploring Where to Purchase Tools and Materials
Before starting your project, it’s important to find a reputable supplier where you can purchase high-quality tools and materials. Local hardware stores, home improvement centers, or flooring retailers are ideal places to start. Online retailers can also provide a wide range of options and convenient delivery. Ensure that the supplier offers trustworthy brands and products to ensure a successful and long-lasting installation.
Preparing the Stairs for Installation
Preparing the stairs properly before installing hardwood flooring is essential for a smooth and durable result. This involves several important steps, including removing existing flooring, checking and repairing the stair structure, and cleaning and leveling the stairs.
Removing Existing Flooring
Before beginning the installation process, you need to remove any existing flooring on the stairs. This can include carpet, laminate, or old hardwood. Carefully detach the flooring material from the stairs, taking care not to damage the underlying structure. Use a pry bar or a carpet knife to lift and remove the flooring, ensuring that the surface is clean and free from any debris or adhesive residue.
Checking and Repairing the Stair Structure
Once the existing flooring is removed, thoroughly inspect the stair structure for any damage or loose components. Check for any loose or creaking steps and ensure that the risers and treads are securely attached. If any repairs or reinforcements are necessary, take the time to address them before proceeding with the installation. This will ensure a sturdy and stable foundation for your new hardwood flooring.
Cleaning and Leveling the Stairs
Before installing the hardwood, it’s important to clean the stairs thoroughly. Remove any dust, dirt, or debris using a vacuum or a broom. If needed, use a damp cloth or mop to wipe down the stairs, ensuring that the surface is clean and dry before proceeding. Additionally, check the levelness of the stairs. If any steps are uneven, use shims or leveling compound to correct the alignment. A level and straight staircase will contribute to the overall quality and stability of the hardwood flooring installation.
Measuring and Cutting the Hardwood Planks
Proper measuring and cutting of the hardwood planks are crucial for a precise and professional-looking installation. Taking accurate measurements and making clean cuts will ensure a seamless fit on your stairs.
Measuring Stairs for Hardwood Pieces
Start by measuring the length and width of each tread and riser individually. Add a quarter-inch to each measurement to allow for expansion and contraction. Write down these measurements and transfer them to the hardwood planks, making sure to avoid any knots or imperfections in the wood. Double-check measurements to ensure accuracy before making any cuts.
Cutting Hardwood Planks to the Right Size
Using a circular saw or a miter saw, carefully cut the hardwood planks according to the measurements you took. Take your time and ensure the cuts are clean and precise. Remember to wear appropriate safety gear, such as safety goggles and gloves. Label each cut piece according to its position on the stairs to maintain organization and ease during the installation process.
Determining Stair Nosing Positioning
Stair nosing, which is a piece of molding placed on the edge of each step, provides a finished and safe look to your hardwood stairs. Before installation, determine the positioning of the stair nosing by measuring the overhang of each step. This overhang should be consistent across all steps. Once measured, carefully cut the stair nosing to fit the dimensions of each step. Take care to align the nosing properly, ensuring a seamless transition between the riser and tread.
Stair Nosing Installation
Installing stair nosing is an important step in the hardwood flooring installation process. It not only enhances the appearance of the stairs but also adds an extra level of safety by providing a slip-resistant and durable edge.
Explaining the Importance of Stair Nosing
Stair nosing plays a crucial role in protecting the edges of the stairs from wear and tear caused by foot traffic. It also helps prevent accidents by providing a visible and slip-resistant surface. Additionally, stair nosing adds a decorative element to your stairs, enhancing the overall aesthetic appeal.
Positioning and Securing Stair Nosing
Carefully position the stair nosing on the edge of each step, ensuring it aligns perfectly with the riser and cover any gaps between the stair and the nosing. Use adhesive, screws, or both to secure the nosing in place. Be sure to follow the manufacturer’s instructions and use the appropriate adhesive or fasteners for your specific hardwood and stair type. Take care to allow sufficient drying or curing time for the adhesive before proceeding with the installation of the hardwood planks.
Addressing Any Unusual or Irregular Stairs
If your stairs have any unusual or irregular features, such as curved steps or bullnose ends, it may require additional planning and customization during the stair nosing installation. In such cases, consult with professionals or seek guidance from reputable sources to ensure the proper installation and fit of the stair nosing.
Installing Hardwood on Risers and Treads
With the stair nosing installed, you can now proceed to install the hardwood flooring on the risers and treads of the stairs. Proper preparation and installation techniques are important for achieving a beautiful and durable result.
Preparing Risers and Treads for Hardwood
Before installing the hardwood, ensure that the risers and treads are clean and free from any debris. Remove any dust or dirt with a vacuum or a damp cloth. If necessary, use wood filler to repair any cracks or imperfections. Allow the wood filler to dry completely before proceeding with the installation.
Tips for Securing the Hardwood
To secure the hardwood planks to the risers and treads, you can use either adhesive or nails, depending on your preference and the type of hardwood chosen. Apply the adhesive or nails according to the manufacturer’s instructions, ensuring the hardwood is securely attached. Take care not to apply too much force when nailing to prevent any damage to the wood. Additionally, use a pneumatic nailer to ensure a flush and professional-looking installation.
Arranging Patterns and Boards Effectively
When installing the hardwood planks, consider the overall design and pattern you want to achieve. Start from the bottom of the stairs and work your way up, ensuring a seamless and visually appealing installation. Take care to place the hardwood planks tightly together, leaving no gaps or spaces. Pay attention to the alignment and symmetry of the planks to create a cohesive and aesthetically pleasing look.
Securing and Finishing the Installation
Once the hardwood planks are installed on the risers and treads, securing and finishing the installation is essential to ensure longevity and durability. This includes reviewing adhesives for hardwood stairs, using nails and screws properly, and applying a protective finish.
Reviewing Adhesives for Hardwood Stairs
When selecting adhesives for hardwood stairs, it’s important to choose a high-quality adhesive that is suitable for the specific hardwood and stair type. Consider factors such as the adhesive’s bond strength, resistance to moisture, and ease of application. Consult with professionals or reputable sources to determine the best adhesive for your particular installation.
Using Nails and Screws Properly
If you choose to use nails or screws to secure the hardwood planks, ensure that they are appropriate for the installation. Use a pneumatic nailer or a drill to drive the nails or screws at the appropriate angles and depths, ensuring a secure and flush attachment. Take care not to overdrive the nails or screws, as this can cause damage to the hardwood.
Applying Finish to Hardwood Stairs
Applying a finish to your hardwood stairs is crucial for protection against wear and tear, as well as enhancing the natural beauty of the wood. Choose a finish that is suitable for stairs, such as a clear sealant or stain, and follow the manufacturer’s instructions for application. Apply the finish evenly and allow sufficient drying time before subjecting the stairs to foot traffic. Regularly maintain the finish by cleaning and refinishing as needed to ensure the long-term beauty and durability of your hardwood stairs.
Addressing Potential Challenges and Solutions
During the hardwood flooring installation on stairs, you may encounter challenges that require specific solutions. Being prepared and knowledgeable about these potential challenges will help ensure a smooth and successful installation.
Dealing with Uneven Stairs
If your stairs have uneven steps, it can make the installation process more challenging. To address this, use shims or leveling compounds to correct the unevenness and ensure a stable base for the hardwood planks. Take the time to measure and adjust each step individually to achieve a level and consistent result.
Correcting Measurement Mistakes
Measurement mistakes can happen, but they can be corrected with careful planning and precision. Take accurate measurements and double-check them before making any cuts. If a mistake occurs, measure again and adjust your calculations accordingly. Remember to leave some margin for error by adding a quarter-inch to each measurement, allowing for adjustments and any irregularities in the stairs.
Handling Warped or Damaged Hardwood Planks
In rare cases, you may encounter warped or damaged hardwood planks during the installation process. If this occurs, it’s important to address the issue promptly to maintain the quality and integrity of the hardwood flooring. Consult with professionals or reputable sources for guidance on techniques to straighten warped boards or replace damaged planks. It’s crucial to ensure that the replacement boards match the existing hardwood in terms of type, color, and finish to maintain a seamless and consistent appearance.
Maintaining Hardwood Stairs After Installation
Once your hardwood stairs are beautifully installed, it’s important to maintain them properly to ensure their longevity and beauty.
Cleaning and Caring for Hardwood Stairs
Regular cleaning is essential to keep your hardwood stairs looking their best. Use a soft broom or vacuum with a brush attachment to remove dust and debris regularly. Avoid using excessive water or harsh chemicals when cleaning, as they can damage the finish or penetrate the wood. Instead, use a damp cloth or mop with a mild hardwood floor cleaner recommended by the manufacturer to clean any spills or stains.
Repairing Minor Scratches and Damage
Over time, your hardwood stairs may develop minor scratches or damage. To repair these, use a hardwood floor repair kit or touch-up markers that match the color of your hardwood. Gently buff the area with a soft cloth or sandpaper, following the manufacturer’s instructions, before applying the repair solution. Take care to feather the repair seamlessly into the surrounding surface for a flawless result.
Long-Term Maintenance and Restoration Tips
To preserve the beauty and longevity of your hardwood stairs, it’s important to follow some long-term maintenance and restoration tips. Avoid wearing high heels or shoes with sharp or spiked soles on the stairs, as they can cause damage to the wood. Place floor mats or rugs in high-traffic areas to prevent excessive wear. Periodically check the condition of the finish and, if needed, apply additional coats or refinish the stairs to restore their original shine. Regular maintenance, such as dusting, cleaning, and addressing any minor issues promptly, will ensure that your hardwood stairs remain in excellent condition for years to come.
Installing hardwood flooring on stairs is a rewarding project that can elevate the aesthetic and value of your home. By understanding the fundamentals of hardwood flooring, selecting the right materials and tools, properly preparing the stairs, and following the installation and maintenance guidelines, you can achieve a stunning and durable result. Whether you choose prefinished or unfinished hardwood, take your time, follow the proper techniques, and enjoy the process of transforming your stairs into a beautiful focal point in your home.
