Have you ever thought about adding the timeless beauty of hardwood flooring to your bathroom? Many people believe that hardwood is not suitable for wet areas like bathrooms, but with the right techniques and materials, it can be a stunning addition to any bathroom. In this article, we will guide you through the process of installing hardwood flooring in a bathroom, ensuring that your project is a success. From choosing the right type of hardwood to preparing the subfloor and ensuring proper moisture protection, we’ve got you covered. Get ready to transform your bathroom into a stylish and inviting space with the warmth and elegance of hardwood flooring.
Materials Needed for Installation
Hardwood flooring options
When it comes to choosing hardwood flooring for your bathroom, there are several options available. You can opt for solid hardwood, engineered hardwood, or even bamboo flooring. Solid hardwood is made from a single piece of wood and provides a timeless and authentic look. Engineered hardwood, on the other hand, consists of multiple layers of wood with a top layer of hardwood veneer. This type of flooring is more durable and resistant to moisture, making it a great choice for bathroom installations. Bamboo flooring is also a popular option due to its sustainability and durability.
Underlayment materials
Underlayment is an essential component of any hardwood flooring installation. It provides a smooth and level surface for the hardwood to be installed on and helps to reduce noise and prevent moisture from seeping through. For bathroom installations, it is recommended to use a moisture-resistant underlayment to protect the hardwood from water damage. Some popular options include cork underlayment, rubber underlayment, and foam underlayment.
Essential tools and equipment
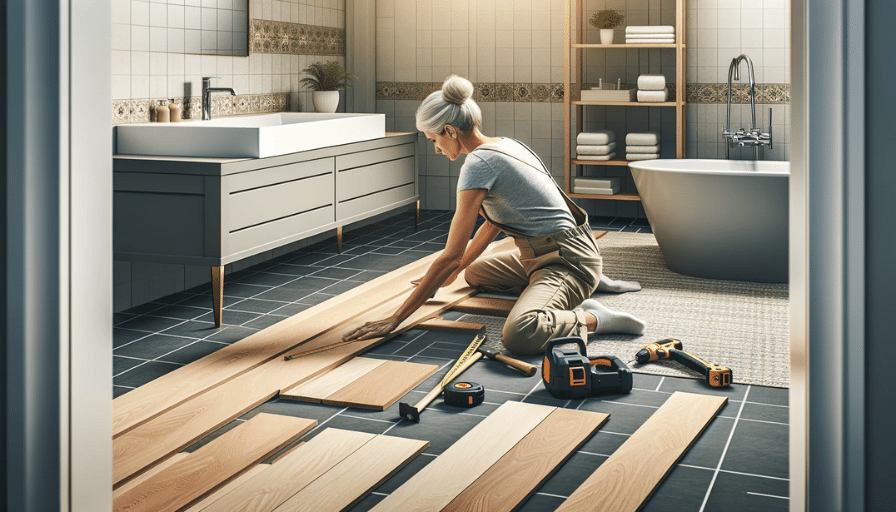
To install hardwood flooring in your bathroom, you will need a few essential tools and equipment. These include a circular saw for cutting the hardwood, a pneumatic nail gun for securing the boards, a tape measure for taking measurements, a chalk line for marking layout lines, a pry bar for removing existing flooring, and a trowel for applying adhesive. Additionally, you will also need safety equipment such as safety glasses and knee pads to protect yourself during the installation process.
Sealing options for bathroom environment
Sealing your hardwood floor is crucial in a bathroom environment to protect it from moisture and humidity. There are various options available for sealing hardwood floors, including polyurethane, water-based sealers, and oil-based sealers. Polyurethane sealers provide a durable and long-lasting finish, while water-based sealers are eco-friendly and have a low VOC (volatile organic compounds) content. Oil-based sealers offer excellent water resistance but may require more maintenance. It is essential to choose a sealer that is specifically designed for bathroom use to ensure maximum protection for your hardwood flooring.
Preparation for Installation
Determining the square footage
Before starting the installation process, it is essential to determine the square footage of your bathroom. This will help you calculate the amount of hardwood flooring and underlayment materials you will need for the project. Measure the length and width of the bathroom and multiply the two measurements to get the total square footage. Remember to account for any nooks, crannies, or irregularities in the bathroom layout.
Subfloor preparation
Proper subfloor preparation is crucial for a successful hardwood flooring installation. Start by removing the existing flooring, ensuring that the subfloor is clean, dry, and free from any debris. If there are any imperfections or uneven areas, use a leveling compound or plywood underlayment to create a smooth surface. It is also essential to check for any signs of moisture or water damage and address them before proceeding with the installation.
Bathroom features adjustment
When installing hardwood flooring in a bathroom, it is important to take into consideration the features and fixtures present in the space. Make sure to adjust the height of the toilet flange and door casings to accommodate the new flooring. This may require using a jamb saw or a handsaw to trim the bottoms of the casings or removing and reinstalling the toilet flange at the proper height. Proper adjustment of these bathroom features will ensure a seamless and professional-looking installation.
Choosing the Right Type of Hardwood
Factors to consider
Choosing the right type of hardwood for your bathroom requires careful consideration of various factors. One crucial factor is the moisture resistance of the wood. Since bathrooms are prone to water spills and high humidity levels, it is important to select a hardwood species that is known for its water resistance. Another factor to consider is the overall style and aesthetic you want to achieve. Different hardwood species offer a range of colors, grains, and textures, so choose one that complements your bathroom design.
Best hardwood types for bathroom
When it comes to hardwood flooring for bathrooms, some species stand out for their exceptional moisture resistance. Oak is a popular choice due to its durability and water-resistant properties. Other hardwood species like teak, walnut, and maple are also suitable for bathroom installations. Engineered hardwood with a top layer of water-resistant hardwood veneer is another excellent option as it combines the beauty of solid hardwood with enhanced moisture resistance.
Cost and quality of hardwood types
The cost and quality of hardwood can vary depending on the species and grade of the wood. While solid hardwood generally has a higher price tag, it offers unmatched beauty and longevity. Engineered hardwood, although more affordable, is still a high-quality option that provides excellent moisture resistance. When considering cost versus quality, it is important to strike a balance that fits your budget and requirements. Additionally, factor in the cost of installation and any necessary maintenance to get a complete picture of the overall investment.
Applying the Underlayment
Importance of underlayment in bathroom
Underlayment plays a crucial role in the installation of hardwood flooring in a bathroom. It acts as a moisture barrier, preventing water from seeping through and damaging the hardwood. Additionally, underlayment provides insulation, soundproofing, and added cushioning, making your bathroom experience more comfortable. Using a moisture-resistant underlayment specifically designed for bathroom environments will help prolong the lifespan of your hardwood flooring and protect it from potential water damage.
Procedure to apply underlayment
To apply the underlayment, start by ensuring that the subfloor is clean and dry. Roll out the underlayment material over the entire bathroom floor, making sure to overlap the seams by several inches. Trim any excess underlayment using a utility knife. Once the underlayment is in place, secure it to the subfloor using staples or adhesive, following the manufacturer’s instructions. It is important to ensure that the underlayment is installed smoothly and without any wrinkles or gaps to maintain a level surface for the hardwood flooring.
Troubleshooting underlayment issues
While applying underlayment is a relatively straightforward process, certain issues may arise. If there are dips or uneven areas in the subfloor, use plywood underlayment to level the surface before installing the underlayment. Additionally, if you encounter any tears or gaps in the underlayment material, patch them up with additional underlayment or tape. It is crucial to address any underlayment issues before proceeding with the installation of the hardwood flooring to ensure a smooth and problem-free installation.
Flooring Layout Planning
Planning the layout
Before installing the hardwood flooring, it is important to plan the layout to ensure a visually pleasing and efficient installation. Start by identifying the focal point of the bathroom, such as a vanity or bathtub, and determine the best starting point for laying the hardwood. Consider the flow of the room and how the hardwood will interact with existing features. It is also important to account for any architectural features or obstacles in the bathroom, such as vents or floor drains.
Considering the floor and tile pattern
When planning the layout, consider the existing floor and tile pattern in your bathroom. If you have a tiled floor, you may want to align the hardwood with the grout lines for a cohesive look. Alternatively, you can opt for a staggered or herringbone pattern to add visual interest to the space. Take accurate measurements of the bathroom and create a detailed layout plan to guide you during the installation process.
Cutting and adjusting the hardwood
Once you have planned the layout, it is time to cut and adjust the hardwood to fit the dimensions of your bathroom. Start by measuring the length and width of the bathroom and cutting the first row of hardwood boards accordingly. Use a circular saw or a miter saw to make precise cuts. Remember to leave a small gap between the flooring and the walls to allow for expansion. Use a jigsaw or a coping saw to cut the hardwood around bathroom fixtures and obstacles for a seamless and professional finish.
Hardwood Flooring Installation
Step-by-Step on hardwood installation
Installing hardwood flooring in a bathroom follows a step-by-step process that ensures a successful and durable installation. Start by laying the first row of hardwood boards along the longest wall, leaving a small gap for expansion. Use a pneumatic nail gun to secure the boards to the subfloor, placing nails at regular intervals along the length of each board. Repeat this process for subsequent rows, making sure to stagger the boards for a more stable installation. Use a tapping block and mallet to ensure a tight fit between the boards and prevent gaps.
Spacing and aligning the hardwood
Proper spacing and alignment are crucial for a professional-looking hardwood installation. Leave a small gap, usually around 1/2 inch, between the flooring and the walls to allow for expansion and contraction. Use spacers to maintain a consistent gap throughout the installation process. When aligning the hardwood, ensure that the boards are straight and parallel to the walls. This can be achieved by using a chalk line or a laser level to mark reference lines. Taking the time to properly space and align the hardwood will result in a visually appealing and structurally sound flooring.
Dealing with corners and edges
Installing hardwood flooring around corners and edges requires special attention to detail. When reaching a corner, cut the hardwood boards to fit the space, ensuring a snug fit. Use a coping saw or a jigsaw to make precise cuts to achieve a seamless joint. Along the edges of the bathroom, you may encounter baseboards or existing trim that need to be removed and then reinstalled over the hardwood flooring. Take care when removing and reinstalling these trim pieces to maintain a clean and finished look.
Sealing the Hardwood Floor
Why sealing is critical for bathroom floor
Sealing the hardwood floor in a bathroom is crucial to protect it from moisture and humidity. Bathrooms are high-moisture environments, and without proper sealing, the hardwood can warp, swell, or develop mold and mildew. Sealing creates a protective barrier that prevents water from penetrating the wood, prolonging its lifespan and maintaining its appearance. Additionally, sealing enhances the overall durability of the hardwood, making it more resistant to scratches and stains.
Choosing the right type of sealer
There are different types of sealers available for hardwood flooring, and choosing the right one for your bathroom is important. Water-based sealers are a popular choice for bathroom installations as they have a low VOC content and dry quickly. Polyurethane sealers provide a more durable finish and offer excellent water resistance. Oil-based sealers are another option, offering increased water repellency. Consider factors such as drying time, durability, and maintenance requirements when selecting a sealer for your bathroom hardwood flooring.
Procedure to apply sealer
Before applying the sealer, ensure that the hardwood flooring is clean and free from any dust or debris. Start by stirring the sealer thoroughly to ensure an even application. Use a clean brush or roller to apply the sealer, working in small sections at a time. Apply the sealer evenly, following the grain of the wood, and make sure to cover the entire surface. Allow the sealer to dry completely before applying additional coats, typically following the manufacturer’s recommended drying times. It is important to apply multiple coats to achieve a durable and long-lasting finish.
Maintenance of Hardwood Flooring
Cleaning and caring tips
Proper maintenance is essential to keep your hardwood flooring in the bathroom looking its best. Regular cleaning is crucial, but it is important to use the right products and techniques to avoid damaging the wood. Avoid using excessive water or harsh chemicals when cleaning the hardwood. Instead, opt for a mild cleanser specifically formulated for hardwood floors and use a damp mop or cloth to gently clean the surface. Wipe up any spills immediately to prevent water from seeping into the wood and causing damage.
Preventing water damage
Preventing water damage is key to maintaining the longevity of your hardwood flooring in a bathroom. To avoid water damage, it is essential to address any leaks or plumbing issues promptly. Use mats or rugs in areas of the bathroom where water is frequently present, such as near the sink or bathtub. Wipe up any spills or splashes immediately to prevent water from pooling on the hardwood surface. Additionally, ensure proper ventilation in the bathroom to reduce humidity levels, as excess moisture can lead to warping or cupping of the hardwood.
Repairing and replacing damaged boards
Over time, your hardwood flooring may experience wear and tear or sustain damage, such as scratches or dents. When this occurs, it is important to address the issue promptly to prevent further damage. Minor scratches can be repaired using touch-up kits or wood fillers specifically designed for hardwood flooring. For deeper scratches or damage, it may be necessary to replace the affected boards. This can be done by carefully removing the damaged boards and installing new ones using the same installation techniques employed during the initial installation.
Common Mistakes to Avoid
Avoiding Expansion and contraction issues
One common mistake to avoid when installing hardwood flooring in a bathroom is failing to account for expansion and contraction. Hardwood is a natural material that expands and contracts with changes in temperature and humidity. Failing to leave adequate gaps for expansion can cause the hardwood to buckle or warp. It is crucial to follow manufacturer guidelines and leave the recommended gap between the flooring and walls or other fixed objects. Using spacers and ensuring proper spacing throughout the installation process will help prevent expansion and contraction issues.
Avoid incorrect sealing
Properly sealing hardwood flooring in a bathroom is critical to protect it from moisture. A common mistake is using the wrong type of sealer or applying insufficient coats. Using a sealer that is not specifically designed for bathroom use can lead to inadequate water resistance, rendering the seal ineffective. Applying too few coats of sealer may also leave the hardwood vulnerable to damage. It is important to choose the right sealer for your bathroom and follow the manufacturer’s instructions regarding the number of coats needed for optimal protection.
Avoiding improper subfloor preparation
Subfloor preparation is a crucial step in the installation of hardwood flooring, and neglecting this step can lead to problems down the road. Failing to adequately level the subfloor or address any moisture issues can cause the hardwood to become uneven or develop mold and mildew. It is important to thoroughly clean and dry the subfloor, repair any imperfections, and ensure that it is level before proceeding with the installation. Taking the time to properly prepare the subfloor will result in a more stable and long-lasting hardwood flooring installation.
Environmental and Health Impact
Choosing eco-friendly hardwood
When considering hardwood flooring for your bathroom, it is important to take into account the environmental impact of your choice. Opting for eco-friendly hardwood options can help reduce your carbon footprint and promote sustainability. Look for hardwood that is sustainably sourced, such as FSC-certified or reclaimed wood. These options help preserve forests and reduce deforestation. Additionally, consider the production process and choose hardwood that is manufactured using low VOC emissions or environmentally friendly finishes.
Understanding the health implications
The health implications of hardwood flooring in a bathroom are also important to consider. Hardwood is generally considered a healthier option compared to carpet or vinyl flooring, as it does not trap dust, allergens, or mold. However, in a high-moisture environment like a bathroom, it is crucial to maintain proper ventilation and prevent water damage to avoid the growth of mold and mildew. Regular cleaning and maintenance will help ensure a healthy indoor environment and prevent potential health risks associated with moisture-related issues.
Opting for sustainable installation choices
In addition to choosing eco-friendly hardwood, opting for sustainable installation choices can further minimize the environmental impact of your bathroom flooring project. Consider using low VOC adhesives and sealers, which emit fewer harmful chemicals into the air. Additionally, choose installation techniques that minimize waste, such as using precision cuts and maximizing the use of leftover materials. Recycling or repurposing any waste generated during the installation process is also a sustainable choice. By making conscious decisions during the installation process, you can contribute to a greener and more sustainable bathroom flooring project.
In conclusion, installing hardwood flooring in a bathroom requires careful consideration and proper planning. By choosing the right materials, preparing the subfloor correctly, and following the recommended installation and maintenance practices, you can enjoy the beauty and durability of hardwood in your bathroom for years to come. Remember to take into account the specific requirements of a bathroom environment, such as moisture resistance and proper sealing, to ensure the longevity and performance of your hardwood flooring. With the right knowledge and approach, you can create a stunning and functional bathroom with hardwood flooring that adds warmth and elegance to the space.
