
Are you looking to add a touch of elegance and warmth to your home? Installing hardwood flooring over plywood can be a great way to achieve that timeless look. Not only does it add value to your property, but it also creates a cozy and inviting atmosphere. In this article, we will guide you through the step-by-step process of installing hardwood flooring over plywood, ensuring a smooth and successful project. So grab your tools and get ready to transform your space into the home of your dreams.
Understanding the Basics
Importance of Proper Installation
Proper installation is crucial when it comes to hardwood flooring. Not only does it ensure the longevity and durability of the flooring, but it also determines how well the floor will look once it’s installed. By following the correct installation techniques, you can avoid potential problems such as buckling, warping, or gaps between the planks.
Types of Hardwood Flooring
Before beginning the installation process, it’s important to understand the different types of hardwood flooring available. Solid hardwood flooring is made entirely from solid wood and is a popular choice due to its natural beauty and longevity. Engineered hardwood flooring, on the other hand, consists of multiple layers of wood veneers that are pressed together, offering greater stability and resistance to moisture. Each type has its own unique characteristics and benefits, so it’s important to choose the one that best suits your needs and preferences.
Benefits of Hardwood Flooring Over Plywood
There are several advantages to choosing hardwood flooring over plywood. Firstly, hardwood flooring is exceptionally durable and can withstand heavy foot traffic, making it a great option for busy areas of the home. Additionally, hardwood flooring adds warmth and elegance to any space, enhancing the overall aesthetic appeal of your home. Unlike plywood, hardwood flooring can also be refinished multiple times, allowing you to change the look of your floor without replacing it entirely. With proper care and maintenance, hardwood flooring can last for decades, making it a worthwhile investment.
Materials and Tools Required
List of needed tools
To properly install hardwood flooring over plywood, you will need several tools. These include a tape measure, chalk line, circular saw, miter saw, jigsaw, pneumatic nail gun, pry bar, rubber mallet, carpenter’s square, and a T-square.
Recommended brands and models for each tool
When it comes to tools, investing in high-quality brands is essential. Some recommended brands for these tools include DEWALT, Bosch, Makita, and Bostitch, as they are known for their reliability and durability. For specific models, consider the DEWALT DWS780 miter saw, the Bosch JS470E jigsaw, and the Makita AN924 framing nailer.
Where to purchase tools and materials
You can find the necessary tools and materials for installing hardwood flooring at various retailers. Home improvement stores like Home Depot and Lowe’s offer a wide range of options and have knowledgeable staff who can assist you in choosing the right tools and materials for your project. Online retailers such as Amazon also provide a convenient way to shop for these items. Be sure to compare prices and read customer reviews to ensure you are getting the best quality products at the most affordable prices.
Preparing the Plywood Subfloor
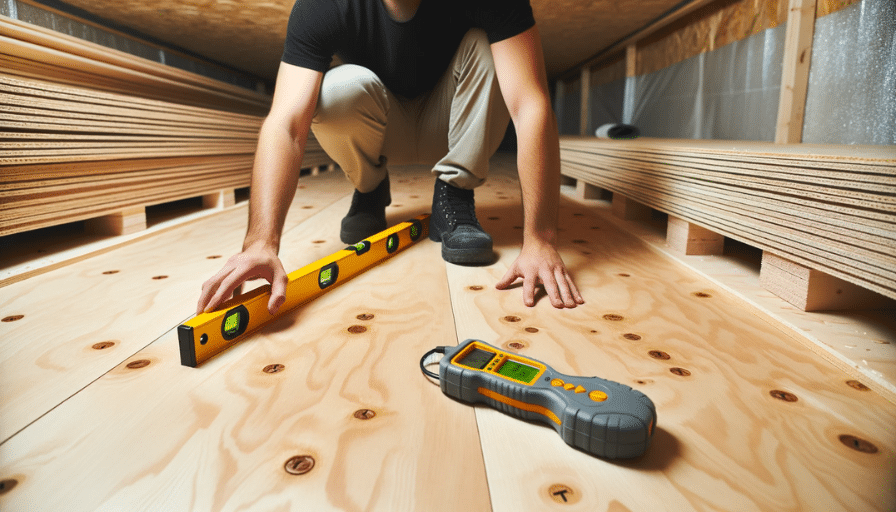
Ensuring the Subfloor is Flat
Before installing hardwood flooring, it’s important to ensure that the plywood subfloor is flat and level. Any unevenness or imperfections in the subfloor can lead to problems with the hardwood flooring later on. Use a straightedge or a level to check for any high or low spots on the subfloor. If you come across any areas that are not level, you will need to sand them down or use a leveling compound to create a smooth and even surface.
Checking for Moisture Content
Moisture can be a major concern when installing hardwood flooring over plywood. Excess moisture in the subfloor can cause the hardwood planks to warp or buckle over time. Before installation, use a moisture meter to measure the moisture content of the plywood subfloor. The acceptable moisture level typically falls between 6-9%. If the subfloor exceeds this range, it may be necessary to address any moisture issues before proceeding with the installation.
Sanding and Cleaning the Subfloor
To ensure a proper bond between the hardwood flooring and the subfloor, it’s important to thoroughly clean the plywood surface before installation. Remove any dust, dirt, or debris using a broom or vacuum cleaner. Once the subfloor is clean, sand it lightly to create a slightly rough surface. This helps in improving the adhesion of the flooring adhesive and promotes a stronger bond between the subfloor and the hardwood planks.
Choosing the Right Hardwood Flooring
Understanding Hardwood Grades
Hardwood flooring is available in different grades, which determine the overall appearance and quality of the planks. The most common hardwood grades include clear, select, and common grades. Clear grade hardwood flooring features a uniform and consistent look with minimal knots and color variation. Select grade hardwood flooring has slightly more color variation and may include small knots. Common grade hardwood flooring has a rustic appearance and includes more knots and color variation. Understanding these grades will help you select the hardwood flooring that best suits your desired aesthetic and budget.
Choosing the Right Wood Type and Finish
Another important consideration when choosing hardwood flooring is the type of wood and the finish. Popular wood species for hardwood flooring include oak, maple, cherry, and walnut, each with its own unique characteristics and grain patterns. The finish of the hardwood can also vary, with options such as matte, semi-gloss, and high-gloss finishes available. Consider the overall style and aesthetic of your home, as well as your personal preferences, when selecting the wood type and finish.
Considering the Room’s Purpose and Traffic
When choosing hardwood flooring, it’s important to consider the purpose of the room and the level of traffic it will receive. Some wood species may be more resistant to scratches and wear than others, making them ideal for high-traffic areas such as hallways or living rooms. Additionally, rooms prone to moisture, such as bathrooms or kitchens, will require a wood species that is more resistant to moisture damage. By considering these factors, you can ensure that the hardwood flooring you choose is well-suited to the specific needs of each room in your home.

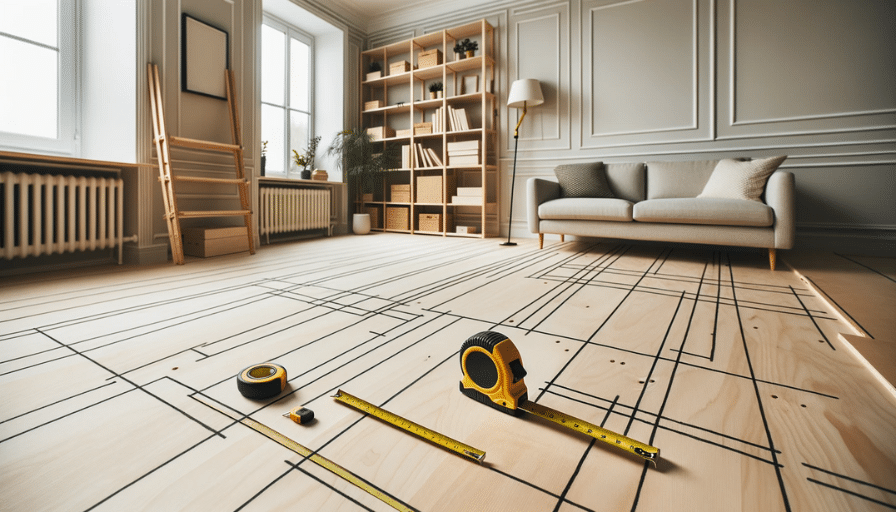
Planning the Layout of Your Hardwood Floor
Determining the Direction of the Planks
The direction in which you lay the hardwood planks can significantly impact the overall look and feel of the space. The general rule of thumb is to install the planks parallel to the longest wall in the room. This helps create an elongating effect and makes the room appear larger. However, there may be certain factors, such as the shape of the room or the direction of natural light, that could influence the direction of the planks. Take these factors into consideration and choose the direction that best suits the layout and design of the room.
Calculating the Number of Planks Required
Before you begin the installation process, it’s important to accurately calculate the number of planks you will need to complete the project. Measure the length and width of the room and multiply the two numbers to determine the total square footage. When purchasing hardwood flooring, it’s recommended to add an additional 10% to account for any waste or mistakes during installation. By calculating the number of planks needed in advance, you can ensure a smoother installation process and avoid any delays or shortages.
Creating an Installation Plan
Once you have determined the direction of the planks and calculated the number of planks required, it’s important to create an installation plan. Start by plotting out the layout of the planks on paper, taking into consideration any obstacles or unique features in the room. This will help you identify any areas that may require additional cutting or adjustments. By creating a detailed installation plan, you can streamline the installation process and minimize any potential issues or mistakes.
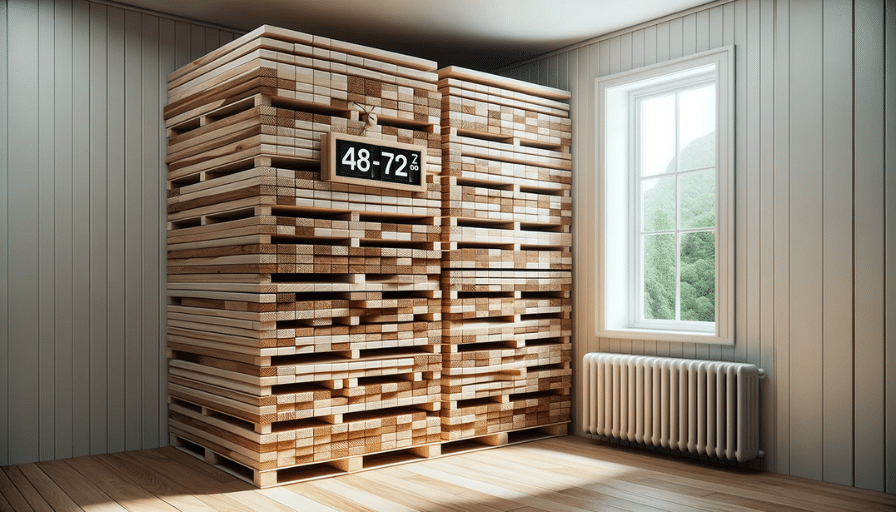
Acclimating the Hardwood Floor
Why Acclimating is Necessary
Acclimating the hardwood flooring is a crucial step before installation. Wood is a natural material that can expand or contract based on the surrounding humidity levels. By allowing the hardwood planks to acclimate to the environment in which they will be installed, you can minimize the risk of uneven expansion or contraction after installation. Acclimating the planks also helps to ensure a more stable and long-lasting floor.
Steps to Properly Acclimate Hardwood Floor
To acclimate the hardwood flooring, follow these steps:
- Leave the packaged planks in the room where they will be installed for a minimum of 72 hours.
- Keep the room temperature and humidity levels consistent during this acclimation period. This means avoiding extreme temperature changes or excessive humidity levels.
- Open the packaging of the planks but do not remove them from the boxes. This allows the wood to breathe and adjust to the room’s environment.
- Stack the planks in a flat and stable manner, ensuring that air can circulate around them. Avoid stacking them too high, as this can cause bending or warping.
By following these steps, you can ensure that the hardwood planks are properly acclimated before installation, reducing the risk of any issues or damage.
Common Mistakes when Acclimating Hardwood
There are some common mistakes to avoid when acclimating hardwood flooring. One of these is failing to provide enough acclimation time. Acclimating the planks for a minimum of 72 hours is recommended, but in some cases, longer acclimation periods may be necessary. Another mistake is not properly maintaining the temperature and humidity levels during the acclimation period. Fluctuations in these conditions can lead to problems after installation. Additionally, stacking the planks too high or in an unstable manner can cause bending or warping. Avoiding these mistakes will ensure a successful acclimation process.
Installing the Underlayment
Choosing the Right Underlayment
Underlayment is an important component of a hardwood flooring installation. It helps provide a smooth and level surface for the hardwood planks, while also reducing noise and improving insulation. When choosing underlayment, consider factors such as moisture resistance, soundproofing properties, and compatibility with your specific hardwood flooring. Some popular options include foam, cork, and rubber underlayment, each offering different benefits depending on your needs and preferences.
Preparing the Underlayment
Before installing the underlayment, ensure that the subfloor is clean and free of any debris. Roll out the underlayment across the entire floor, ensuring that it covers the entire surface area. Trim any excess underlayment using a utility knife or scissors. It’s important to have a smooth and even underlayment surface to provide a solid foundation for the hardwood flooring.
Laying the Underlayment
Once the underlayment is prepared, lay the first row along the longest wall, ensuring that it is aligned with the direction of the hardwood planks. When positioning subsequent rows, overlap the underlayment seams by a few inches to create a smooth transition. Secure the underlayment to the subfloor using staples or adhesive, depending on the type of underlayment used. Be sure to follow the manufacturer’s instructions for proper installation techniques.
Installing the Hardwood Flooring
Starting the First Row
To start installing the hardwood flooring, begin with the first row along the longest wall. Make sure to leave a small gap between the wall and the planks to allow for expansion. Use a pneumatic nail gun to secure the first row of planks to the subfloor, placing nails at a slight angle to ensure a strong and secure bond. Make sure each plank is snugly fit against the previous one, providing a seamless and visually appealing installation.
Applying Adhesive to the Hardwood
As you continue with the installation, apply flooring adhesive to the tongue of each plank before connecting it to the previous row. This helps create a stronger bond between the planks and reduces the risk of any movement or gaps. Use a rubber mallet to gently tap the planks into place, ensuring a tight and secure fit.
Staggering the Hardwood Planks
To create a more visually appealing and structurally sound installation, it’s important to stagger the hardwood planks. This means that the end joints of adjacent rows should not line up with each other. Instead, aim for a random and natural pattern by starting each row with a different length plank. Staggering the planks helps distribute weight and minimizes the risk of floor failure or instability.
Finishing the Hardwood Floor
Trimming and Installing the Final Row
Once all the planks are installed, it’s time to trim and install the final row. Measure and cut the planks to fit the remaining space, leaving the same small gap between the wall and the planks. Use a pry bar or a rubber mallet to gently fit the final row into place, ensuring a snug and secure fit. Finally, secure the planks by nailing or gluing them to the subfloor.
Cleaning the Hardwood Floor
After the hardwood floor installation is complete, it’s important to thoroughly clean the surface. Remove any excess adhesive or debris using a damp cloth or mop. Avoid using excessive water or harsh cleaning solutions, as these can damage the finish of the hardwood. Regular cleaning and maintenance will help preserve the beauty and longevity of your new hardwood floor.
Installing Baseboards and Moldings
To complete the look of your hardwood flooring, consider installing baseboards and moldings. These finishing touches help cover any gaps between the flooring and the walls, providing a polished and seamless appearance. Choose baseboards and moldings that complement the style and color of your hardwood flooring. Installation techniques may vary depending on the type of molding used, so be sure to follow the manufacturer’s instructions for proper installation.
Maintaining Your Hardwood Floor
Recommended Cleaning Techniques
To keep your hardwood floor looking its best, regular cleaning is essential. Use a soft-bristle broom or a microfiber dust mop to remove any dust, dirt, or debris. Avoid using wet mops or excessive water, as this can damage the wood. Instead, use a damp cloth or mop for spot cleaning, using a mild wood cleaner if necessary. Be sure to dry the floor thoroughly after cleaning to prevent moisture damage.
The Importance of Humidity Control
Humidity control is crucial for the maintenance of hardwood flooring. Fluctuations in humidity levels can cause the wood to expand or contract, leading to gaps or buckling. Use a humidifier in dry climates or during the winter months to add moisture to the air. In more humid climates or during the summer months, use a dehumidifier to remove excess moisture. Keeping humidity levels consistent will help preserve the stability and appearance of your hardwood floor.
Repairing and Refinishing Your Hardwood Floor
Over time, your hardwood floor may require repairs or refinishing. Small scratches or dents can be filled in using wood putty or wax sticks that match the color of your flooring. For more extensive damage, such as deep scratches or gouges, it may be necessary to hire a professional to sand and refinish the floor. Regularly inspecting your hardwood floor for any signs of wear or damage will allow you to address any issues promptly, ensuring the longevity and beauty of your investment.
By following these steps and best practices, you can successfully install hardwood flooring over plywood and enjoy the beauty and durability of this timeless flooring option in your home. Whether you choose solid hardwood or engineered hardwood, proper installation and maintenance will help ensure that your hardwood floor remains a stunning centerpiece for years to come. Happy installing!
