When installing new flooring, testing subfloor moisture is essential. High moisture levels can lead to serious problems like warping and mold growth. By understanding the importance of moisture testing, you can prevent costly damage and guarantee compliance with industry standards. But how do you effectively test for moisture, and what methods should you use? Let’s explore the key techniques and insights that will help you make informed decisions for your flooring project.
Importance of Moisture Testing for Flooring
When you’re installing flooring, understanding the importance of moisture testing can’t be overstated.
Subfloor moisture testing is vital to guarantee you’re working with acceptable moisture levels for hardwood floors. High moisture levels can compromise the bond between your flooring and the subfloor, leading to costly repairs down the line. By accurately evaluating moisture content, you can choose the right materials that resist moisture damage.
Additionally, installing a vapor barrier under flooring helps prevent moisture vapor transmission, protecting your investment. Addressing ground moisture is crucial to ensuring the longevity and performance of your flooring system. Furthermore, unchecked moisture can lead to significant issues such as cupping and buckling, which can drastically affect the overall quality of your flooring. Following industry standards like ASTM guarantees you get reliable moisture evaluations, allowing for a successful installation that lasts.
Ensuring thorough moisture testing helps prevent peeling and other long-term issues associated with high moisture levels. Testing in multiple locations is essential for identifying high moisture concentrations, further reinforcing the importance of thorough assessments.
By doing so, you can effectively manage moisture levels that impact installation procedures and flooring type selection, ultimately enhancing your flooring’s durability.
Prioritizing moisture testing will set the foundation for a durable and aesthetically pleasing flooring solution.
Prevention of Damage From High Moisture Levels
Understanding moisture testing lays the groundwork for preventing damage from high moisture levels in subfloors. Regular moisture testing is essential to catch any issues early, allowing you to implement high moisture in subfloor solutions effectively. Measuring moisture content before installation is crucial to ensure compatibility between flooring materials and subfloor. Additionally, using concrete moisture meters allows for accurate assessments of moisture levels, ensuring timely interventions. Proper subfloor preparation minimizes risks associated with excessive moisture, further safeguarding your flooring investment.
To effectively manage moisture, it is important to recognize that excess moisture in subfloors can migrate to hardwood flooring, leading to serious issues such as cupping. Installing vapor barriers prevents moisture migration, while proper ventilation reduces accumulation. Consider using dehumidifiers to maintain stable humidity levels, and seal your subfloors to limit moisture absorption. Addressing potential sources of moisture, such as leaks or inadequate installation, is critical to prevent flooring moisture problems. Regular inspections and maintenance will guarantee your subfloor remains in good condition, ultimately protecting your flooring investment and enhancing your home’s safety and comfort. The subfloor serves as a stable, flat surface that supports the weight of furniture and appliances while maintaining structural stability.
Compliance With Industry Standards
When you’re testing subfloor moisture, following ASTM standards is essential for ensuring accuracy and reliability. Compliance with these standards not only helps prevent installation issues but also boosts your credibility with clients. Furthermore, adhering to moisture guidelines ensures that your hardwood and subfloor are within the acceptable moisture levels for a successful installation. Understanding the importance of knowing the thickness of various layers can greatly affect the accuracy of moisture assessments. Additionally, measuring the moisture vapor emission rate is crucial for determining the compatibility of flooring materials with concrete.
ASTM Standards Importance
Compliance with ASTM standards is essential for guaranteeing reliable moisture testing in subfloors, as it not only assures that your results are recognized by flooring manufacturers but also enhances the overall credibility of your evaluations.
By adhering to ASTM F2170 and the calcium chloride test procedure, you obtain consistent data important for measuring moisture levels. Using a moisture meter for wood subfloor helps confirm that your testing methods align with industry practices. Excess moisture can lead to flooring issues, making it critical to ensure accurate testing results. Increased flooring problems arose from water-based adhesive formulations when moisture levels were not properly managed.
This compliance minimizes errors, meeting legal requirements and warranty conditions. Additionally, standardized methods provide a reliable framework for measuring moisture, giving you confidence in your findings.
Ultimately, following ASTM standards sets you apart as a professional committed to quality and accuracy in moisture testing.
Compliance Benefits for Installations
Confirming your moisture testing aligns with industry standards brings numerous benefits for installations. By conducting concrete moisture test flooring, you adhere to moisture thresholds set by manufacturers, safeguarding your warranty and enhancing installation credibility.
Compliance documentation is crucial, providing a record that demonstrates your adherence to industry regulations. This proactive approach not only protects your reputation but also reduces long-term costs associated with moisture-related failures. As moisture is identified as the leading cause of flooring failure, understanding and managing it effectively can significantly mitigate risks, especially considering that ideal temperature and humidity levels are essential for flooring longevity. Utilizing RH testing allows for a deep understanding of moisture conditions, ensuring informed installation decisions are made.
With accurate testing methods and proper instrument calibration, you can prevent costly repairs and liability claims. Regular training on evolving technologies keeps you up-to-date, further solidifying your commitment to quality assurance.
Ultimately, compliance guarantees a successful installation, giving you peace of mind and confidence in your work.
Cost Efficiency Through Early Detection
Detecting moisture issues early can save you considerable costs down the line. By testing wood subfloor moisture content, you can identify problems before they escalate into costly repairs. Excess moisture can cause serious effects on flooring, like buckling and mold growth, leading to expensive fixes. Utilizing relative humidity probe testing ASTM F2170 and moisture meters greatly reduces the likelihood of moisture-related damages. Additionally, moisture testing is essential for ensuring that flooring is installed on a stable surface.
When you address these issues upfront, you avoid the need for replacement flooring and the associated costs. In addition, accurate moisture testing helps you choose the right moisture barrier, preventing future repair expenses. This proactive approach enhances floor longevity and ensures that installations remain reliable over time. Furthermore, being aware of potential moisture issues even with specialized flooring materials can significantly reduce the risk of flooring failures. Moreover, understanding the importance of moisture measurement can guide you in identifying and mitigating issues before they become significant concerns.
Ensuring Quality Assurance in Installations
Quality assurance in flooring installations hinges on thorough moisture testing and evaluation. To guarantee you’re on the right track, focus on these essential steps:
- Subfloor Evaluation: Assess moisture levels before installation.
- Moisture Testing Tools: Use accurate moisture meters for precise readings.
- Documentation: Keep records of all tests for accountability.
- Environmental Considerations: Adjust for temperature and humidity during testing.
- Compliance with Standards: Follow ASTM guidelines for reliable results. Understanding how to test concrete moisture before flooring is vital, as is awareness of concrete drying time flooring. Properly evaluating excess moisture can prevent costly repairs and ensure the longevity of your flooring.
Common Moisture Testing Methods
When it comes to testing subfloor moisture, you’ve got several effective methods at your disposal. The Plastic Sheet Method, Calcium Chloride Test, and Relative Humidity Probes each offer unique advantages for evaluating moisture levels. Proper moisture testing can inform necessary additional steps, such as sealing or using moisture barriers. Understanding these options will help you choose the right approach for your specific needs. Additionally, combining test methods can enhance moisture measurement accuracy and provide a more comprehensive view of the conditions. It’s essential to follow ASTM testing standards to ensure the accuracy and reliability of your moisture testing results.
Plastic Sheet Method
The Plastic Sheet Method, also known as ASTM D4263, offers a straightforward approach to evaluating moisture levels in concrete before applying coatings.
Here’s how you can conduct the test:
- Use a 4-mil thick transparent polyethylene sheet.
- Seal an 18×18 inch section onto the concrete with duct tape.
- Leave it in place for at least 16-24 hours.
- Inspect the sheet for signs of moisture, like darkening or beading.
- Perform the test in suitable environmental conditions, avoiding direct sunlight.
While it’s a quick preliminary assessment, remember that this method provides qualitative results and may not detect deeper moisture issues. It is important to note that the test is designed to detect capillary moisture in concrete, which may affect the accuracy of results in certain conditions. Additionally, this method does not quantify moisture levels, making it essential to follow up with more precise testing for accurate results. Understanding the importance of moisture testing is crucial to prevent potential issues and costs related to moisture problems. Conducting this test requires at least one test for every 500 square feet of slab size for reliable results.
Calcium Chloride Test
Moisture management is essential in flooring installation, and the Calcium Chloride Test is a reliable method to measure moisture vapor emission from concrete subfloors. This test assesses whether a concrete slab is suitable for flooring by using anhydrous calcium chloride to absorb moisture vapor over 24 hours. The process involves placing pre-weighed jars under sealed plastic domes on a clean surface, allowing you to measure the weight difference afterward. Preparation for the test includes marking off a specific area and ensuring a clean, smooth surface to achieve accurate results. Accurate moisture testing is essential to prevent costly replacements, helping you avoid flooring failures. Widely accepted in the industry and compliant with ASTM F1869-11, it’s easy to conduct and provides quantitative moisture data, making it a preferred choice for moisture assessment in flooring projects. The test also includes pH testing for alkalinity of the concrete to ensure compliance with industry standards.
Relative Humidity Probes
Relative humidity probes are a robust solution for evaluating moisture levels in concrete subfloors. They provide accurate and reliable measurements, vital for informed flooring decisions.
Here’s why you should consider using them:
- Reliability: You get precise moisture readings.
- Quantitative Data: Crucial for effective installation planning.
- ASTM Compliance: Follows ASTM F2170 standards for consistency.
- Thorough Measurements: Measures moisture at significant depths for extensive insights.
- Reduced Risk: Lowers chances of flooring issues like warping or mold. Additionally, the flooring industry recognizes the necessity of testing concrete slab moisture before installation.
When using RH probes, remember to drill holes for insertion, maintain temperature equilibrium, and allow a 24-hour acclimation period for reliable readings. Additionally, ensure that you follow proper drilling procedures to avoid compromising the test results.
Plastic Sheet Method (ASTM D4263)
When evaluating concrete for flooring installations, the Plastic Sheet Method (ASTM D4263) provides a straightforward approach to indicate moisture presence.
You’ll need a transparent polyethylene sheet, about 4 mils thick, and duct tape to secure it. Select a clean area, measuring at least 18×18 inches, and tape the sheet down, making sure all edges are sealed. Leave it in place for a minimum of 16 hours.
Afterward, inspect for moisture, looking for beading or discoloration. Remember, this method only indicates moisture presence, not its quantity.
It’s crucial to document your testing conditions and results. For thorough assessment, consider following up with more precise methods to guarantee your flooring installation’s success.
Calcium Chloride Test (ASTM F1869)
Now that you understand the Plastic Sheet Method, let’s explore the Calcium Chloride Test (ASTM F1869). This test provides a straightforward procedure for measuring moisture vapor emissions from concrete floors, and it’s essential for interpreting results accurately. The Calcium chloride test has been used since the early 1940s and gained acceptance as a practical standard over the years. However, it is important to note that this method primarily tests surface conditions, which may not reflect the moisture levels deeper within the slab. We’ll also discuss its advantages and limitations to help you make informed decisions for your flooring projects.
Test Procedure Overview
To effectively assess moisture levels in concrete subfloors, you’ll follow a structured procedure outlined by the Calcium Chloride Test (ASTM F1869).
Here’s a quick overview of the essential steps:
- Clean a 20 x 20 inch area of concrete, free from debris and curing agents.
- Seal the calcium chloride container under a plastic dome to create an airtight environment.
- Confirm the room’s temperature is around 75°F ±10°F, with 50% ±10% relative humidity.
- Place the test kit and record the initial weight of the calcium chloride.
- After 60 to 72 hours, reweigh the container and document the final weight for analysis. This testing method is standardized to ensure consistency in testing procedures.
Following these steps guarantees a reliable measurement of moisture vapor emissions from your subfloor.
Results Interpretation Guidelines
After completing the Calcium Chloride Test, you’ll need to interpret the results accurately to assess moisture levels in your concrete subfloor. The moisture vapor emission rate (MVER) is expressed in pounds per 1000 square feet over a 24-hour period. Many flooring manufacturers require an MVER of 5 lbs or less, with some specifying 3 lbs or less for warranty coverage. Confirm the test runs for 60 to 72 hours, and that HVAC conditions are stabilized beforehand.
High MVER can lead to flooring damage like warping or bubbling. Running the test for 60 to 72 hours is crucial for accurate results. To get a thorough moisture profile, consider combining this test with relative humidity tests. Testing in multiple locations helps account for uneven drying across the slab. Additionally, proper testing of concrete’s moisture condition can prevent or mitigate moisture-related issues, making it vital to understand the results of this test.
Advantages and Limitations
While the Calcium Chloride Test (ASTM F1869) offers a reliable method for evaluating moisture vapor emission rates in concrete, it comes with both advantages and limitations that you should consider.
Here are some key points:
- Non-Destructive: It’s safe to use on existing concrete surfaces without causing damage.
- Widely Accepted: This test is a recognized standard for measuring moisture vapor emissions.
- Simple Setup: The process is straightforward, involving just a dish of calcium chloride and a plastic dome.
- Surface Measurement: It assesses moisture emitted from the concrete’s surface.
- Historical Use: This method has been trusted in the construction industry for decades. However, be mindful of its environmental sensitivity and variability, which can affect accuracy. Additionally, environmental conditions significantly impact test accuracy, making precise moisture measurement unreliable.
Relative Humidity Test (ASTM F2170)
As you assess the moisture levels in concrete slabs, the Relative Humidity Test (ASTM F2170) stands out for its accuracy and reliability. This standardized method effectively measures moisture content, helping to prevent flooring failures by providing precise data. Unlike previous methods, ASTM F2170 now offers results in just 24 hours, thanks to recent improvements. You’ll drill holes, insert sensors, and allow them to equilibrate before taking readings. This approach is more accurate than surface methods, ensuring you get reliable moisture levels deep within the slab. The recent update allows flooring professionals to take action sooner based on these results.
Compliance with ASTM F2170 guarantees that your testing meets industry standards, which is essential for successful flooring installations. Ultimately, this test supports timely project decisions and safeguards against moisture-related issues. Moreover, in situ testing offers a more accurate assessment of internal moisture compared to previous methods. Regular checks and maintenance of test equipment ensure accuracy and reliability throughout the testing process.
Tools Used in Moisture Testing
When you’re testing moisture levels in subfloors, having the right tools is crucial for obtaining accurate and reliable results. Different tools cater to specific materials, whether wood or concrete. Here are some key tools you should consider:
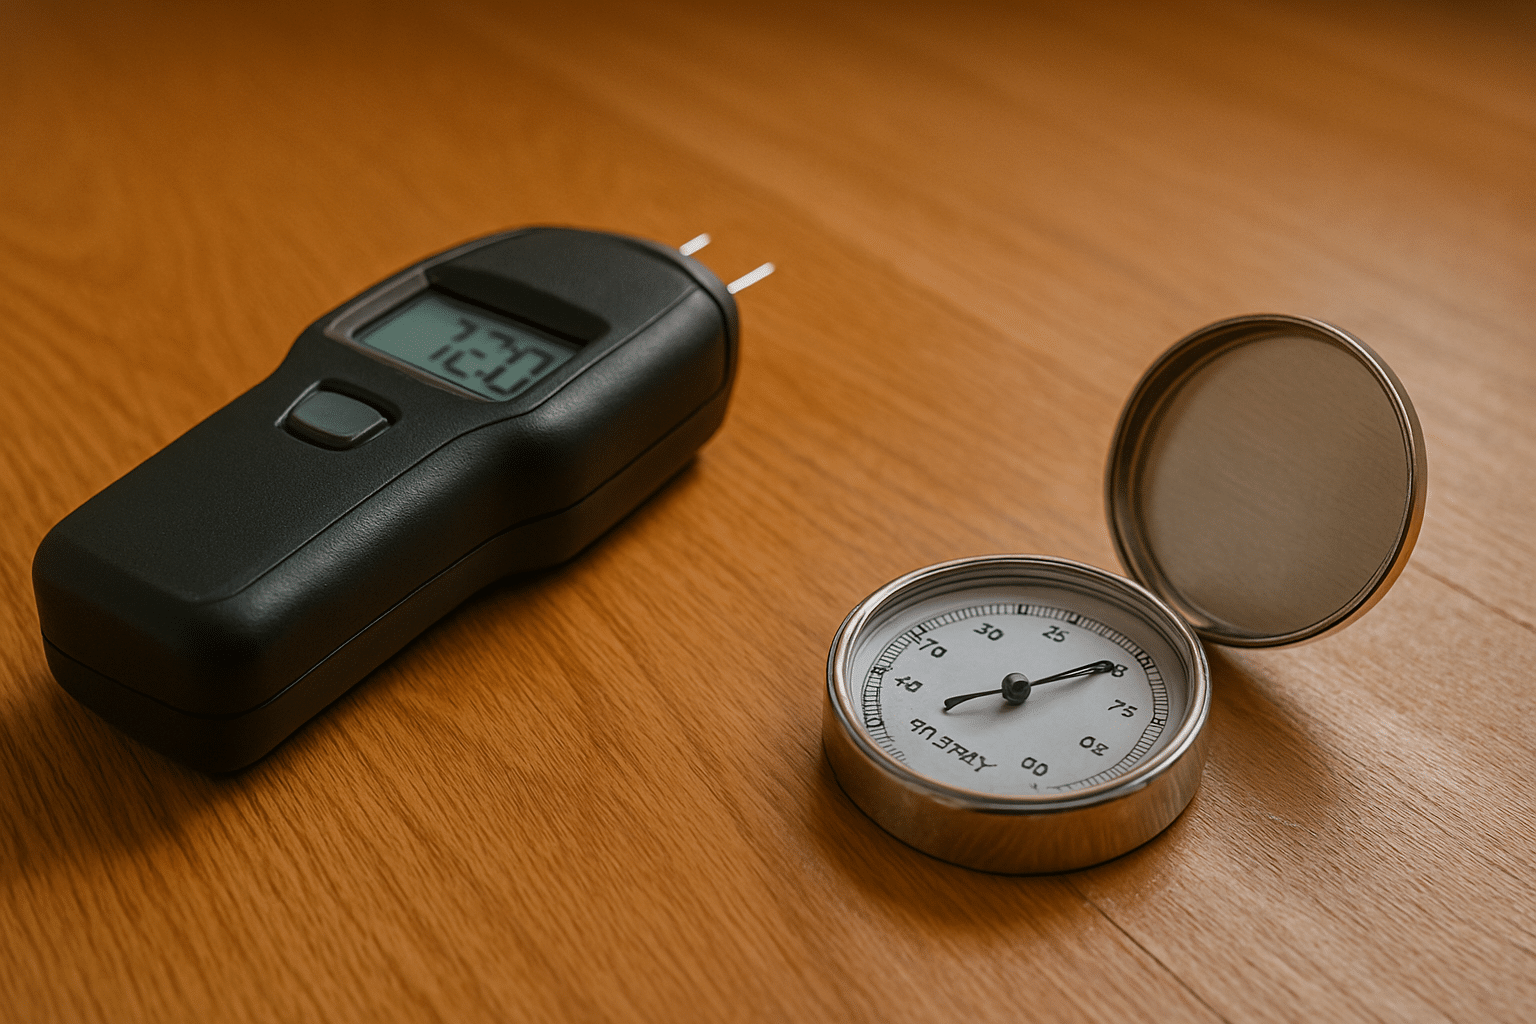
- Moisture Meters: Devices like Wagner Meters’ C555 and Orion 950 give you quick readings.
- RH Probes: Use systems like Rapid RH L6 for quantitative assessments.
- Pinless Meters: Non-invasive options that measure moisture without damage.
- Surface Thermometers: Guarantee ideal test conditions by measuring ambient temperatures.
- Moisture Logging Devices: Track moisture changes over time, helping you monitor persistent issues. Ensuring proper moisture testing is essential for the success of your flooring installation. Using high-end moisture meters designed for wood subfloors can significantly enhance the accuracy of your measurements.
Equipping yourself with these tools helps guarantee a thorough and accurate moisture evaluation.
Factors Affecting Moisture Testing Accuracy
Accurate moisture testing in subfloors hinges on several key factors that can greatly influence your results.
First, guarantee the job site conditions mimic normal living conditions for at least 48 hours before testing. An operational HVAC system helps maintain consistent temperature and humidity, preventing environmental fluctuations from skewing your readings.
Second, your knowledge and preparation matter; different subfloor types require specific testing techniques, and proper documentation is essential. Understanding the importance of moisture testing can significantly enhance your ability to assess and address any potential issues effectively. Additionally, ensure that you are aware of the safe moisture level for your region to prevent costly problems related to moisture content.
Third, consider the subfloor’s material and thickness, as these factors affect moisture distribution and readings.
Finally, avoid common mistakes, like insufficient test locations or using uncalibrated tools, which can lead to incorrect assessments.
Pay attention to these factors for accurate moisture testing.
Interpreting Test Results and Taking Action
After considering the factors that affect moisture testing accuracy, it’s time to interpret your test results and take appropriate action.
If your readings show relative humidity above recommended levels, here’s what you should do:
- Evaluate Results: Confirm if they exceed 75% or other specified thresholds.
- Re-test: If initial readings are high, conduct follow-up tests to monitor changes.
- Document Findings: Keep thorough records of all results for future reference.
- Address Leaks: Fix any identified water intrusion sources immediately.
- Implement Drying Solutions: Use fans, dehumidifiers, or moisture mitigation systems as needed.
Frequently Asked Questions
How Often Should Moisture Testing Be Performed?
You should perform moisture testing regularly, especially before installation, after significant environmental changes, and during ongoing inspections. Keep track of readings to identify potential issues and guarantee your flooring meets required moisture standards.
Can Moisture Testing Affect Existing Flooring?
Yes, moisture testing can greatly affect your existing flooring. It identifies potential moisture issues early, preventing damage like buckling or discoloration. Regular checks guarantee your floors remain stable and maintain their integrity over time.
What Is the Best Time to Conduct Moisture Tests?
You should conduct moisture tests during the pre-installation phase, ideally after acclimating flooring materials and guaranteeing ambient conditions are stable. This timing helps prevent future issues and guarantees ideal conditions for your flooring installation.
Are There Any DIY Moisture Testing Methods?
Yes, you can use DIY moisture testing methods like the plastic sheet test, pin and pinless meters, or visual inspections. Just remember to maintain consistent conditions and document your findings for accuracy.
How Do I Choose the Right Moisture Testing Tool?
To choose the right moisture testing tool, consider your material type, required accuracy, and ease of use. Look for durability and additional features like humidity readings, ensuring it meets industry standards for reliable results.
Conclusion
In summary, testing subfloor moisture isn’t just a step; it’s essential for a successful flooring installation. By using reliable methods and understanding the results, you can prevent damage, guarantee compliance with industry standards, and save costs in the long run. Staying proactive about moisture levels helps you maintain quality and durability in your flooring. So, don’t overlook moisture testing—it’s the key to a lasting and beautiful floor.
References
- https://tnemec.com/remedy-index-page/3-ways-test-concrete-moisture/
- https://www.junckers.com/about/blogposts/technical-bulletins/measurement-of-moisture-in-subfloors
- https://www.wagnermeters.com/concrete-moisture-test/concrete-info/identify-fix-subfloor-moisture-problems/
- https://50floor.com/blog/why-test-for-moisture-before-installing-flooring/
- https://www.floortrendsmag.com/articles/112554-how-to-moisture-test-hardwood-and-subfloor-for-hardwood-installation
- https://blog.stonhard.com/blog/does-my-concrete-require-moisture-testing-before-a-flooring-installation/
- https://www.wagnermeters.com/concrete-moisture-test/concrete-info/measure-subfloor-moisture/
- https://epoxyetc.com/blogs/news/the-importance-of-concrete-moisture-testing
- https://www.flooringtech.org/unit2_insp_test_subfloors/section4_measuring_moisture_and_ph/lesson1_principles_of_moisture_testing.htm
- https://blog.cityfloorsupply.com/how-to-prevent-subfloor-moisture-problems/
