
Epoxy flooring is a specialized floor coating known for creating a durable, glossy, and seamless surface on concrete floors. It has gained popularity in residential garages, basements, and commercial spaces due to its excellent resistance to stains, chemicals, and wear. By applying a liquid epoxy resin that hardens into a solid plastic-like layer, you can transform a dull concrete slab into a high-performance flooring surface.
If you’re considering epoxy flooring, you might find it offers a blend of durability and aesthetic appeal that suits various environments. However, it’s crucial to weigh its advantages against potential drawbacks, like installation costs and safety concerns. Understanding the installation process and what to expect regarding maintenance can make a significant difference in your decision. Let’s explore these factors to see if epoxy flooring is the right choice for you.
Definition & Overview
Epoxy flooring refers to a floor finish created by applying multiple layers of epoxy resin mixed with a hardening agent onto a prepared concrete substrate. The result is a hardened, bonded surface that is often shiny and highly durable. What exactly is epoxy? It’s a type of thermosetting resin; when the resin and hardener chemicals mix, they undergo a chemical reaction called curing, forming a rigid plastic material that adheres to the floor. Epoxy floor systems usually consist of a primer, one or more base coats, and a topcoat. Once cured, the floor becomes seamless (no grout lines or seams) and non-porous, which makes it resistant to water, oil, and most chemicals.
Different types of epoxy floor coatings include:
- Water-based epoxy: A thinner, low-VOC (volatile organic compound) option that’s easier for DIY application but generally less thick and durable than other types.
- Solvent-based epoxy: This type of epoxy contains solvents for better concrete penetration and adhesion. It produces strong fumes during application but cures harder than water-based products.
- 100% solids epoxy: A professional-grade epoxy with no evaporating content, resulting in a very thick, hard coating. It’s extremely durable and often used in industrial settings but requires skilled installation due to quick curing.
Epoxy flooring has been used for decades in commercial and industrial environments (like warehouses, automotive shops, and hospitals) and is now a common upgrade for home garages and workshops. It can protect concrete from damage and enhance a space’s appearance with its glossy finish and customizable colors or patterns. Epoxy is even used to create artistic metallic floors or embed decorative flakes for a terrazzo-like look.
Pros and Cons
While considering flooring options, you’ll find that epoxy flooring presents a mix of advantages and drawbacks that can impact your decision.
Pros
- Exceptional Durability: Epoxy forms a hard, impact-resistant surface that can withstand heavy foot and vehicle traffic. It protects the underlying concrete from chips, stains, and cracks, extending the life of the floor.
- Chemical and Stain Resistance: Once cured, epoxy is resistant to oil, gasoline, paint, cleaners, and many chemicals. Spills can be wiped up without staining the floor, making epoxy ideal for garages or workshops prone to oil or chemical spills.
- Low Maintenance: Epoxy floors are seamless and non-porous, so dirt and liquids rest on the surface. Routine maintenance is easy; sweeping or mopping with a mild detergent typically keeps the floor clean and shiny. No special polishes or waxes are needed.
- Glossy, Attractive Appearance: Epoxy floors have a high-gloss, showroom look and can be customized with pigments, colored flakes, metallic swirls, or patterns to match your design preferences. This can turn a plain concrete slab into an eye-catching feature.
- Waterproof and Seals Concrete: The epoxy coating acts as a seal over concrete, making the floor essentially waterproof and protecting it from moisture damage. This is beneficial in basements or ground-level slabs where moisture might seep through.
- Affordability (Relative to Replacements): Coating an existing concrete slab with epoxy is often cheaper than installing a new floor covering like tile or hardwood. Epoxy flooring costs range from $4 to $10 per square foot installed, which can be cost-effective for large areas.
Cons
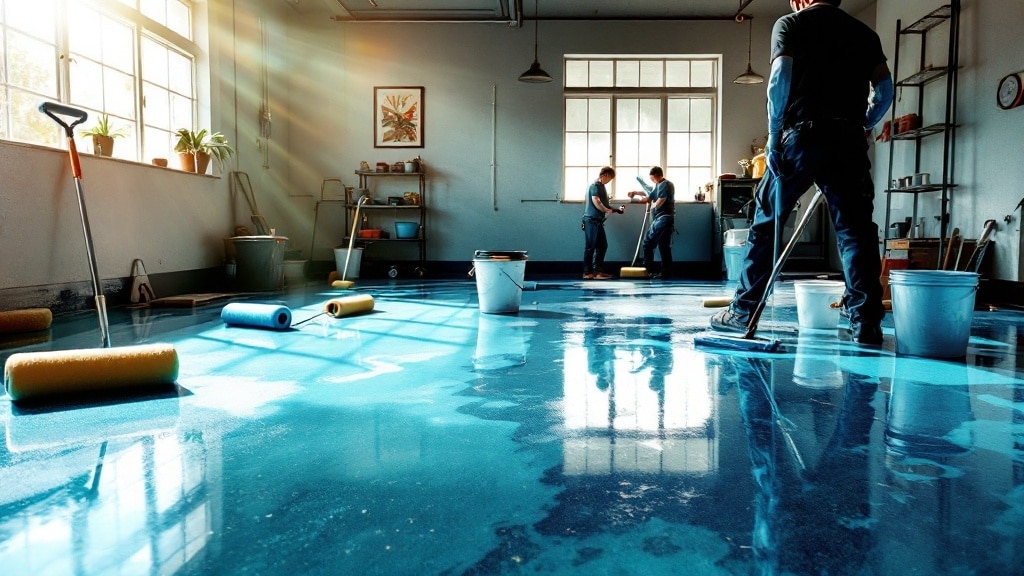
- Challenging Installation: Applying epoxy is labor-intensive and requires careful concrete preparation (cleaning, etching or grinding, repairing cracks) and the right environmental conditions. The application process can be difficult for DIYers as epoxy must be mixed precisely and applied before it starts curing (often within minutes). Professional installation ensures a smooth finish but adds to cost.
- Long Curing Times: Epoxy floors need time to cure (harden) fully. Typically, you can’t walk on it for 16–24 hours and shouldn’t drive on it for 2–7 days. This downtime can be inconvenient, especially for garages. Water-based epoxy is ready for a second coat in about 8–10 hours, solvent-based in 12 hours, and 100% solids epoxy in 24 hours, with complete cure in up to 7 days.
- Temperature and Humidity Sensitive: Epoxy should only be applied when the temperature is about 60–85°F (15–30°C) and humidity below 85%. High humidity or low temperatures can prevent proper curing or cause surface blush (cloudiness). This can limit the installation to certain seasons or require climate control.
- Brittleness in Extreme Cold: While durable under normal conditions, epoxy can become brittle and prone to cracking in extremely cold environments (unless special flexible formulations are used). It isn’t the best choice for unheated garages in very cold climates without proper additives.
- Slippery When Wet: Epoxy’s glossy finish can become slippery if water or oil is on the surface, although some additives (like anti-slip grit or textured flakes) can improve traction. Epoxy is not as slippery as polished concrete when dry and is naturally skid-resistant when dry, but caution is needed with spills.
- Difficult to Remove or Change: Once you have an epoxy floor, removing it is challenging because it bonds strongly to concrete. If you decide to change the flooring later, you may need to grind off the epoxy or cover it with another product, adding time and cost.
Best Use Cases
When choosing flooring, identifying the best use cases for epoxy can help you maximize its benefits. Epoxy flooring excels in certain environments thanks to its durability and protective qualities:
- Garages and Workshops: Perhaps the most popular use. Epoxy can handle vehicle traffic, resist oil/grease, and make cleanup easy, all while giving garages a clean, polished look. It hides minor imperfections in concrete and can brighten the space with its reflective finish.
- Basements: Epoxy can be a good solution for basements, especially those used as home gyms, utility rooms, or recreational spaces. It resists moisture (with a proper concrete moisture barrier if needed) and can cover bare concrete economically. You can add color flakes for a more living-space feel.
- Commercial Kitchens and Restaurants: Epoxy flooring’s seamless, waterproof nature makes it ideal for commercial kitchens, food processing plants, and restaurants (often with added aggregate for slip resistance). It’s easy to sanitize and won’t harbor bacteria due to its lack of seams.
- Retail Stores and Showrooms: Epoxy can create a bright, glossy floor that enhances retail displays or automobile showrooms. The ability to embed logos or create colored zones is a plus for branding. Its hardness holds up well under constant foot traffic and rolling carts.
- Industrial and Warehouses: Heavy-duty 100% solids epoxy floors are common in warehouses, factories, and industrial settings. They withstand forklifts, heavy pallets, and chemicals. Often, safety lines or zones are painted on in contrasting epoxy colors.
- Hospitals and Laboratories: Epoxy’s seamless and hygienic surface is beneficial in healthcare environments where sanitation is critical. The floors can be made chemical-resistant for lab use and are easy to keep sterile.
- Outdoor Patios (with UV-stable epoxy): Some specially formulated epoxy coatings with UV inhibitors can be used outdoors on patios or walkways. These often incorporate a textured finish to prevent slips and resist yellowing from sun exposure.
While epoxy is versatile, it’s not ideal for areas with moving wood subfloors (which can flex and crack the epoxy) or where a softer, warm feel is desired (like living rooms or bedrooms). It truly shines on concrete in utilitarian or commercial-style spaces.
Installation Process (DIY vs Professional)
Epoxy flooring installation involves several critical steps and can be done by skilled DIYers or professionals. Here’s what to expect:
Preparation
- Concrete Inspection: The concrete must be in good condition. Any major cracks or moisture issues should be addressed first. A moisture test is often done to ensure low humidity in the slab.
- Cleaning: All dirt, grease, oil stains, or existing paint/coating must be removed. This often involves degreasing and power scrubbing the concrete.
- Surface Profiling: Epoxy adheres best to a slightly rough surface. Installers usually etch the concrete with acid or use a floor grinder to achieve the proper texture (similar to sanding wood before painting).
- Repairs: Cracks or spalling areas are patched with epoxy filler or concrete repair products and allowed to cure.
- Moisture Barrier (if needed): If moisture is a concern, a vapor barrier epoxy primer may be applied to prevent issues like epoxy delamination.
Application
- Primer Coat: A thin epoxy primer is rolled on (if the system calls for it) to penetrate and seal the concrete, improving adhesion for the next layers.
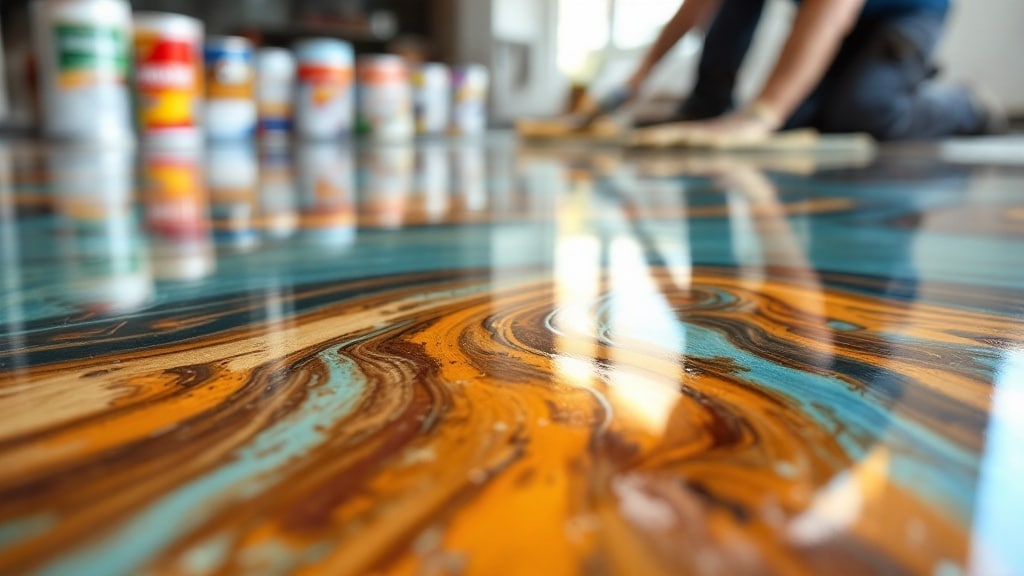
- Base Coat(s): The epoxy resin and hardener are mixed (often with added color pigments) and poured onto the floor. It’s spread evenly using rollers or squeegees. Working time is limited (usually 20–40 minutes) before the epoxy starts to thicken. Large areas must be done in sections to maintain a “wet edge” and avoid visible seams.
- Decorative Elements: If decorative vinyl flakes or quartz sand are used, they are broadcast onto the freshly applied base coat while it’s still wet. This adds texture and color. Excess flakes are swept or vacuumed up after the coat cures.
- Additional Coats: Some systems use two base coats for extra thickness or to incorporate multiple colors/patterns (like metallic epoxy techniques, which might involve pouring different colored epoxies and swirling them).
- Topcoat: As the final layer, a clear topcoat of epoxy or polyurethane is applied. This seals in flakes (if used) and provides a smooth, glossy finish with added protection (polyurethane topcoats, for example, can add UV resistance and scratch resistance).
Curing and Finishing
- The floor needs to cure according to the product instructions. Most epoxies allow light foot traffic after 24 hours, but heavy items, vehicles, or rigorous use shouldn’t occur until 5–7 days later, when the epoxy reaches full hardness.
- If doing a DIY installation, make sure to ventilate the area well, wear protective gear (gloves, respirator, eye protection), and strictly follow the mixing ratios and pot life (usable time after mixing).
- DIY vs Professional: A DIY epoxy kit for a 2-car garage (400–500 sq. ft.) might cost $200–$500 in materials. DIY kits are usually water-based and include an etching solution, epoxy, and flakes. The process will take a homeowner 2–3 days of work plus curing time. Professional installers will use industrial-grade 2-part epoxies, ensure proper concrete prep with commercial grinders, and can usually complete the project in 1–2 days (plus curing) for around $1,500–$3,000 for a 2-car garage, depending on local labor rates and floor condition. If your concrete is pristine and you’re handy, DIY can save money. But for the best long-term results, especially on older or large floors, professional installation is often worth it.
Step-by-Step Quick Guide (DIY Epoxy Floor):
- Day 1: Clean thoroughly and degrease. Etch the floor with the provided solution (or grind). Rinse and let it dry completely overnight.
- Day 2: Patch any cracks. Allow patches to dry.
- Day 3: Apply the primer (if provided). Once tack-free, mix and apply the epoxy base coat. Optional: Broadcast flakes onto the wet epoxy. Let cure overnight.
- Day 4: Sweep off loose flakes. Mix and apply the topcoat (clear or same epoxy without flakes). Allow to cure according to instructions (usually 24–72 hours before light use, a week before heavy use).
- Post-install: Keep the area ventilated to help curing. Don’t rush moving items back in until they are fully cured to avoid blemishes.
Always refer to the specific epoxy product’s installation guide, as times and steps can vary.
Cost Considerations
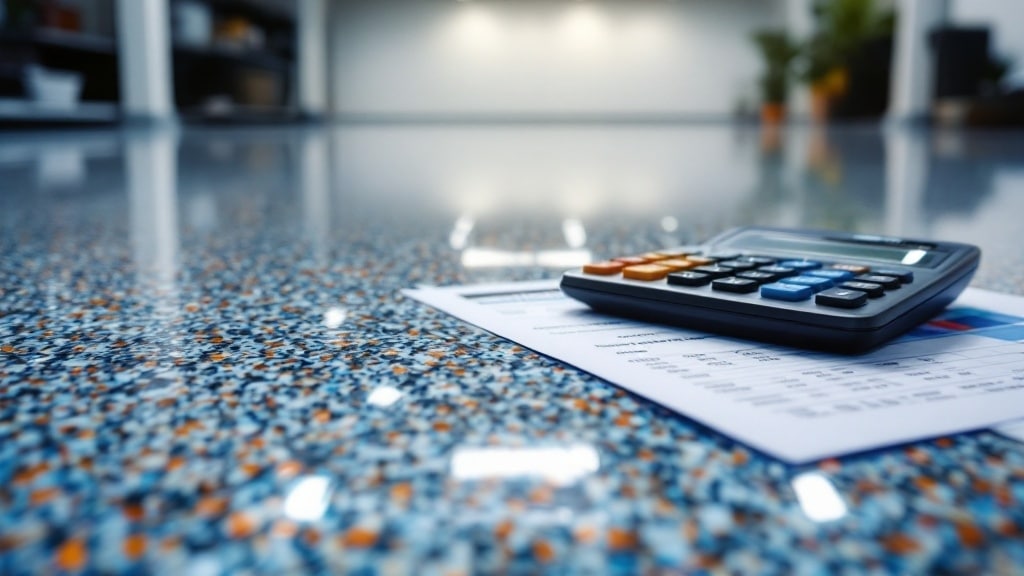
One of epoxy flooring’s attractive qualities is its relatively low cost compared to many other flooring options – especially since it can be applied over existing concrete, eliminating the expense of new subfloors or extensive materials. However, costs can vary widely based on the type of epoxy, project size, and labor. Let’s break down the cost factors:
- Average Cost Installed: Epoxy flooring costs $4 to $10 per square foot installed on average. This means a standard two-car garage (400–500 sq. ft.) might cost roughly $1,600 to $5,000, including professional labor and materials.
- DIY Material Costs: If you do it yourself, epoxy resin prices are $1 to $5 per square foot for materials. For example, a 500 sq. ft. garage might require $500 to $2,500 in epoxy and supplies, depending on the type/quality of epoxy and the number of coats.
- Labor Costs: Professional installation usually adds $3 to $5 per square foot for labor. So half to more than half of the total cost is labor and expertise. Professionals will include surface prep, minor crack repairs, and the use of industrial equipment in this cost.
- Epoxy Type: High-grade 100% solids epoxies with multiple coats and decorative effects (like metallic epoxy or heavy flake broadcast) are on the higher end ($8–$12 per sq. ft.). Basic single-coat, water-based epoxy systems are on the lower end ($3–$5 per sq. ft., especially DIY).
- Project Size: Larger projects have some economies of scale. Covering a 1,000 sq. ft. basement may cost less per square foot than a 200 sq. ft. single garage because mobilization and fixed costs are spread out.
- Floor Condition: If your concrete needs significant repair, leveling, or moisture mitigation, expect additional costs. Removing existing flooring (like old paint or tile) could add $1–$3 per sq. ft. for surface prep.
- Location: Prices vary by region. Urban areas or regions with high demand might see higher labor rates. Travel fees could be included if a contractor has to travel far to your site.
- Design Complexity: Simply rolling on one color of epoxy is straightforward. If you want a custom design with multiple colors, logos, or intricate flake patterns, it will increase labor time (and possibly material costs if multiple batches of epoxy are needed).
- Topcoat Additions: Some epoxy floors include a polyurethane topcoat for extra UV resistance or a non-slip additive (like aluminum oxide grit). These extras can add a bit to material costs but are often worth the improved performance.
Cost Breakdown Table: Epoxy Flooring
| Cost Element | DIY Range | Professional Range |
|---|---|---|
| Epoxy Material | $1 – $5 per sq. ft. (kits or separate resin/hardener) | Often included in total price; high-grade materials are $2 – $4 per sq. ft. |
| Supplies & Tools | $0.50 – $1 per sq. ft. (rollers, brushes, buckets, degreaser, protective gear) | Included (contractor provides) |
| Labor | Your time (10–20 hours for 2-car garage) | $3 – $5 per sq. ft. ($30 – $100 per hour, depending on region) |
| Total Cost (400 sq. ft. Garage) | $400 – $2,400 (assuming DIY, not including your labor value) | $1,600 – $4,000 (all-inclusive) |
Note: These are rough estimates. Always get quotes for your specific project.
Epoxy floors are generally cost-effective, especially for revitalizing existing concrete. A key point is that epoxy’s cost is mostly upfront. Once installed, its maintenance costs are minimal (just cleaning), and it might last many years before needing re-coating, making it a good long-term investment.
Maintenance and Longevity
Epoxy flooring is known for being low-maintenance and long-lasting, but proper care will ensure it reaches its maximum lifespan. Here’s how to maintain an epoxy floor and what longevity to expect:
Longevity
The lifespan of an epoxy floor can vary:
- Water-Based Epoxy: It typically lasts 3 to 5 years in moderate traffic areas. However, because it is thinner, it may show wear sooner, especially in vehicle traffic.
- 100% Solids Epoxy: This type of epoxy can last 10 to 20 years or more, especially in residential settings or low-traffic commercial areas. High-quality, multi-coat systems have excellent longevity.
- Commercial/Industrial Use: In heavy industrial use (constant forklift traffic, heavy machinery), epoxy might need refreshing every 5–10 years in high-wear zones. Still, that’s a solid lifespan under tough conditions.
One sign that an epoxy floor needs maintenance is the loss of shine or the appearance of surface scratches. Minor dulling can often be buffed back to shine or rejuvenated with a new topcoat without stripping the entire floor.
Routine Maintenance
- Dust and Dirt Removal: Regularly sweep or use a dust mop to remove abrasive dirt or grit. Grit can create micro-scratches over time if not removed.
- Mopping: When needed, mop the floor with a mixture of warm water and a gentle all-purpose cleaner or pH-neutral floor cleaner. Avoid using soap-based cleaners, which can leave a hazy film. Also, avoid citrus or acid-based cleaners, which might dull the finish.
- Spill Cleanup: Wipe up liquid spills (oil, chemicals, paint) promptly with a soft cloth or paper towel. Epoxy resists these substances, but prolonged contact with harsh chemicals (like battery acid or brake fluid) could potentially cause slight staining or surface dulling, so timely cleanup is wise.
- Stain Handling: Most substances won’t stain epoxy if removed, but if you notice a mark, a light scrub with a soft scrub pad and a bit of ammonia diluted in water (2–3 oz ammonia per gallon of water) can help.
- Avoid Scratches: Though epoxy is hard, it can scratch. Use felt pads under heavy furniture or equipment. When moving heavy items, lift them or use wheeled carts rather than dragging. In garages, ensure motorcycle kickstands or metal jack stands have a piece of plywood or mat under them to distribute weight.
- Matting: Use walk-off mats or rubber pads at entryways to catch grit from shoes or under tires to prevent “hot tire pickup” (a rare occurrence where hot car tires can pull at the epoxy if the coating is subpar or not fully cured).
Periodic Maintenance
- Re-Sealing/Topcoat: If areas start to lose their shine or show wear after several years, you can apply a new clear coat of epoxy or a polyurethane topcoat to refresh the surface. Before doing this, the floor will need to be cleaned and lightly sanded (to provide some tooth).
- Repairs: If a section chips (for example, if a heavy tool drops and chips the epoxy), repair kits can fill the divot. Serious damage might require patching that area’s epoxy and re-coating a section of the floor to blend it in.
Overall, epoxy floors are extremely easy to keep looking good with basic cleaning. They don’t require waxing, polishing, or special treatments. Thanks to their non-porous nature, they resist staining much better than bare concrete or many other materials. With simple care, an epoxy floor in a residential or light commercial setting can look nearly as good as new a decade later.
Popular Brands & Products
When it comes to epoxy flooring, using a reputable product is key to a lasting finish. Here are some popular epoxy flooring brands and products (for both DIY enthusiasts and professionals):
- Rust-Oleum EpoxyShield: A well-known DIY epoxy kit brand, often found in home improvement stores. They offer water-based epoxy kits for garages and basements that include decorative flakes. It’s user-friendly for homeowners and provides decent durability for light to moderate use.
- Quikrete Epoxy Garage Floor Kit: Another DIY option, Quikrete (known for concrete and masonry products) sells a 2-part water-based epoxy kit similar to Rust-Oleum’s, including a cleaner/etcher and flakes.
- LEGEND (formerly Valspar) Garage Floor Coating: Valspar’s kit (now rebranded in some stores) is a solvent-based epoxy kit available at Lowe’s and other retailers. It tends to yield a thicker coat than water-based kits and has a glossier finish.
- ArmorPoxy: A brand offering higher-grade epoxy flooring systems, including 100% solids epoxies for garage and industrial floors. They have specialized products like military-grade epoxy and metallic epoxy kits, geared more towards experienced DIYers or pro installers.
- Sherwin-Williams General Polymers / H&C: Sherwin-Williams industrial coatings line has epoxy products often used by professionals. H&C Shield-Crete is one of their consumer epoxy lines that have solid performance.
- PPG Amerlock / Novolac Epoxies: These heavy-duty epoxies, commonly used in industrial settings, are highly resistant to chemicals, making them suitable for factories, hangars, and similar environments. While they may be excessive for home use, their effectiveness in commercial applications is remarkable.
- Elite Crete Systems: Known for decorative epoxy and polyaspartic systems, including those high-end metallic and marbleized floor looks. They often train certified installers.
- Dur-A-Flex and Florock: These are commercial brands that supply contractors with epoxy and urethane flooring systems, including customizable colors and blends for large projects (like airports, commercial kitchens).
- Norklad and Epoxy-Coat are two popular DIY kits available. Epoxy-Coat is known for its high solids content and thickness and receives good reviews. Norklad, sold online, offers professional-grade resin for those interested in self-installation.
Epoxy vs. Epoxy Paint: Sometimes, stores sell “epoxy paint,” typically acrylic paint with a bit of epoxy added for adhesion. This is not the same as a true epoxy coating; it’s thinner and less durable. For a robust floor, look for actual two-part epoxy products like those above.
When choosing a brand, consider the intended use (home vs. commercial), the desired thickness and finish, and whether you’ll hire a contractor (who might have a preferred supplier). Check reviews and even ask to see if a local floor is done with that product if possible. Also, be mindful of shelf life. Once you buy an epoxy kit, use it within the recommended time and storage conditions, as the resin or hardener can degrade if stored improperly for long periods.
Comparisons to Other Flooring Types

How does epoxy flooring stack up against alternative flooring solutions? Here’s a comparison highlighting epoxy’s advantages and disadvantages relative to other common floors:
- Epoxy vs. Concrete Sealer: A simple acrylic concrete sealer or stain is cheaper and easier to apply than epoxy, but it’s not as durable or protective. Sealers might cost $1–$2 per sq. ft., whereas epoxy is thicker and can last longer without reapplication. Epoxy offers better chemical resistance and can hide minor imperfections better than a clear sealer.
- Epoxy vs. Polyurethane Coating: Polyurethane coatings can be used on concrete too. They’re often stronger than epoxy and dry much faster, plus can be applied in a wider range of temperatures. However, they usually cost more and are often used as topcoats over epoxy rather than alone. Epoxy adheres extremely well to concrete as a primer/base, while polyurethane might not fill cracks or adhere as strongly without epoxy undercoat.
- Epoxy vs. Polished Concrete: Polished concrete floors are achieved by grinding and polishing the concrete itself to a sheen, often with densifiers. They cost $3–$15 per sq. ft., depending on complexity, similar or more expensive than epoxy. Polished concrete looks elegant and has no coating to potentially peel, but it’s slippery when wet and can stain since it’s still porous (usually they’re sealed, but not to the level epoxy seals). Epoxy gives more design/color options, whereas polished concrete leans on the natural gray look or acid stains.
- Epoxy vs. Tiles (Ceramic/Porcelain): Installing tile in a garage or basement (ceramic, porcelain) can provide a beautiful look and easy cleaning, but tiles can crack under heavy impact, and grout can stain. Tiles range widely from $4 to $120 per sq. ft. (materials) depending on type. Epoxy is seamless (no grout to clean) and generally more impact-resistant (no risk of individual tiles cracking). However, tiles might handle heat better (epoxy can scorch with direct welding sparks, for instance) and have more decorative high-end options (marble tiles, etc.).
- Epoxy vs. Vinyl or Rubber Flooring: Some use vinyl sheets, planks, or rubber mats in garages/gyms. Vinyl flooring is softer underfoot and comes in many designs (even faux wood or stone looks), but it can be punctured or torn by sharp tools and may not handle heavy vehicle weight in a garage as well. Rubber flooring (like gym mats) is excellent for exercise areas with great shock absorption and slip-resistance but is typically only used in sections (not wall-to-wall in living spaces) and has limited design (mostly black with confetti colors). Rubber also has a higher material cost ($3–$8 per sq. ft. for tiles) and a distinct smell initially. Epoxy can cover an entire floor seamlessly and is harder, while rubber is softer and sectional.
- Epoxy vs. Painted Concrete: Simply painting concrete with latex floor paint is inexpensive, but the paint will peel and wear quickly under traffic, often within a year or two in a busy area. Epoxy lasts much longer and is actually bonded to the concrete, not just a thin film on top. If budget is extremely tight, paint is a short-term band-aid, but epoxy is a more permanent solution.
- Epoxy vs. Solid Hardwood or Engineered Wood: You wouldn’t typically put hardwood in a garage or industrial space, but for basements, some consider engineered wood or laminates. Those add warmth and style but are not ideal if there’s any moisture risk. Epoxy obviously doesn’t provide a wood look or warmth, but it wins hands down on water-resistance. Wood or laminate floors in basements could swell or mold in damp conditions; epoxy will not.
epoxy flooring stands out for its durability, seamless protection, and value in spaces where concrete is the base. Its closest competitors for similar uses are polished concrete or other concrete coatings. Compared to those, epoxy often provides more protection (at similar or lower cost) but requires a bit more skill to apply. If you prioritize a tough, long-lasting floor and don’t mind a somewhat industrial look (or you enhance it with colors and flakes), epoxy is hard to beat.
Design & Aesthetic Options
Epoxy flooring opens up a world of design possibilities, allowing you to tailor your space to your unique taste. With options like high-gloss, matte, satin, and metallic finishes, you can choose the perfect look for your environment. Gone are the days when an epoxy floor meant a plain gray, industrial-looking surface. Modern epoxy flooring offers various design and aesthetic possibilities to suit different tastes and settings:
- Solid Colors: Epoxy can be tinted virtually any color. Popular choices include neutral grays, tans, or off-whites for a clean look and bold colors like blue, red, or yellow for branding or visual impact. You might do a solid-color epoxy in a home garage to match the walls or trim of the space.
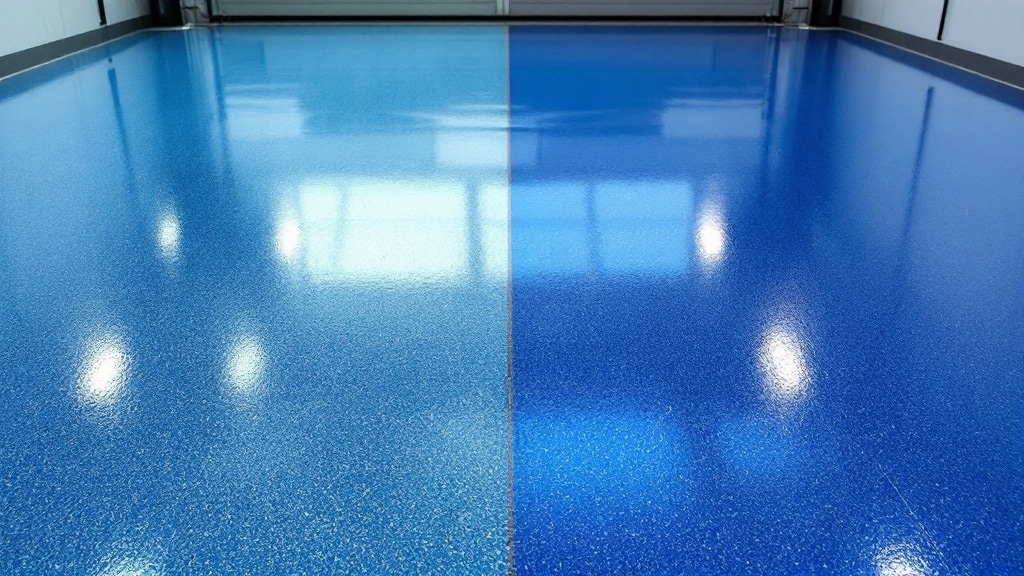
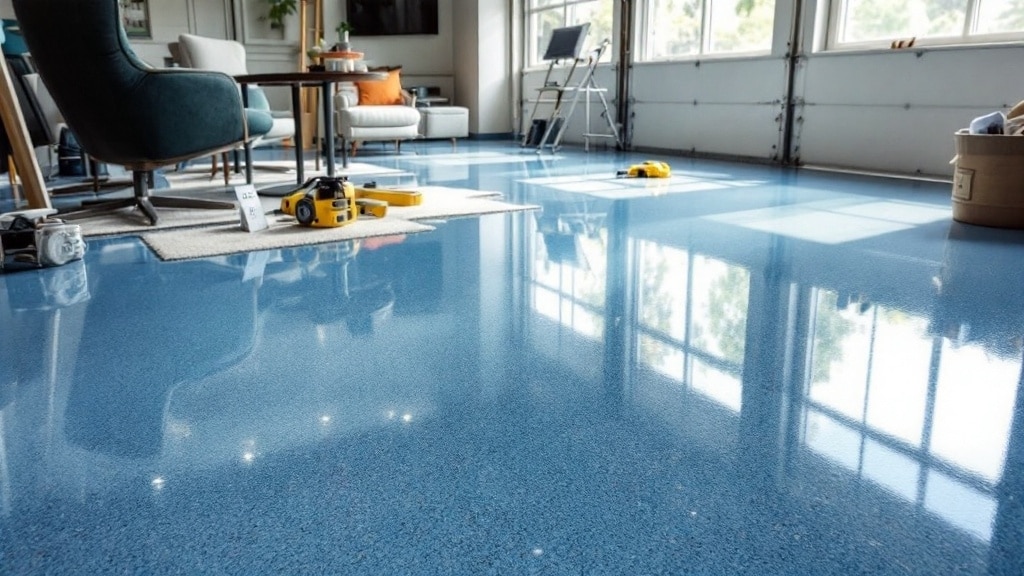
- Decorative Flakes (Chip Flooring): One of the most common decorative epoxy finishes is broadcasting multi-colored vinyl flakes (also called chips) onto the wet epoxy and then sealing them in with a clear coat. The flakes come in various size chips (1/16” up to 1”) and color blends (e.g., tan/black/white mix for a neutral tone or blue/white/gray for a cool tone). This creates a terrazzo-like, lightly textured appearance that also helps mask dirt and tire marks. It’s very popular in garages and on commercial floors. You can choose blends that complement your space – some even mimic granite or stone.
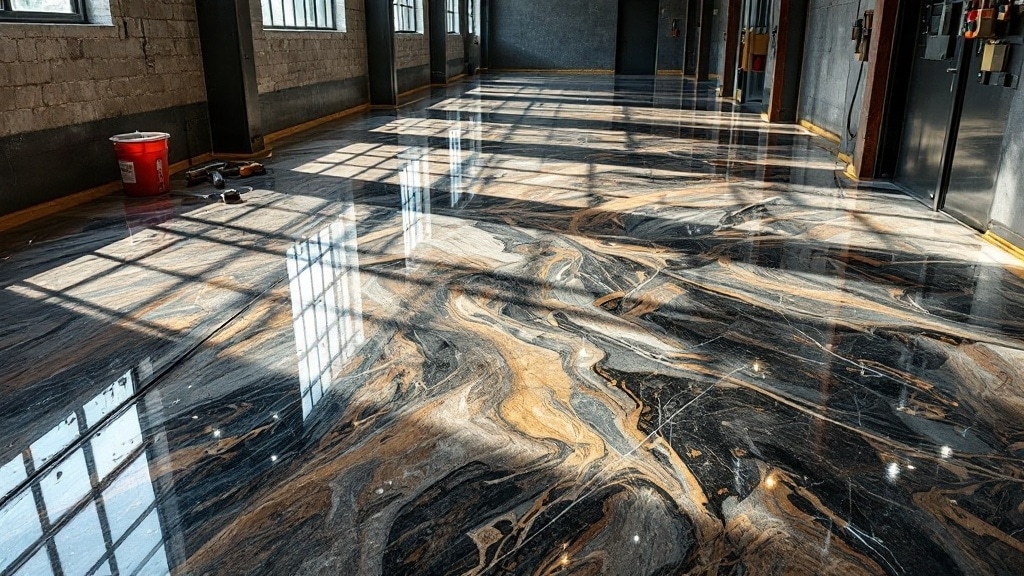
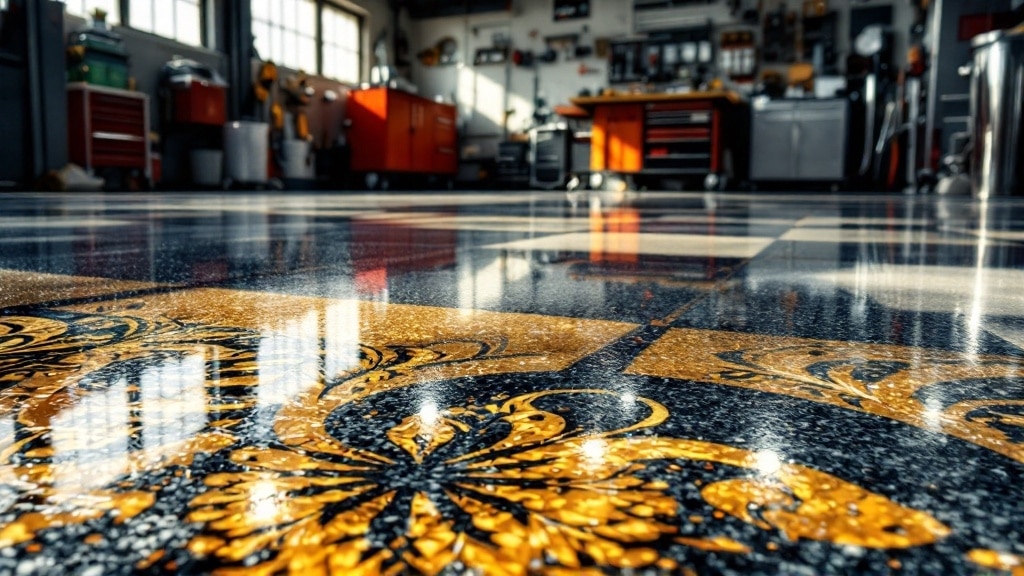
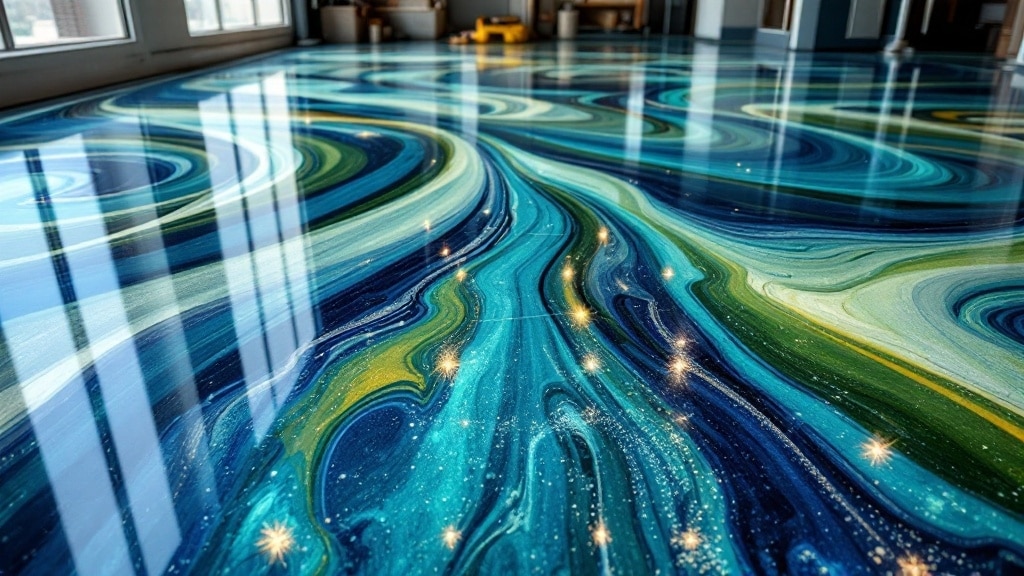
- Metallic Epoxy: This high-end decorative option involves mixing metallic pigments into clear epoxy. Installers create swirling, marbling effects by using multiple colors and techniques like spraying alcohol or moving with air to create unique patterns. The result can resemble marble, flowing water, or a lava lamp, with 3D depth. Each metallic epoxy floor is one of a kind. These are often seen in retail stores, trendy offices, or upscale residential interiors like finished basements. They typically need a skilled contractor for best results.
- Quartz Sand Floors: Similar to flakes, colored quartz sand can be broadcast into epoxy. This is often used for extremely slip-resistant floors (like commercial kitchens, locker rooms, or pool surrounds). It creates a rougher texture with a speckled color look. The sand can be blended colors, too. Such floors are very durable and non-slip, but due to their texture, they are not as easy to mop.
- Logos and Graphics: Epoxy floors can incorporate graphic elements. For example, a company logo stencil can be placed and a different-colored epoxy used in that area, or the logo decal can be laid in and covered with clear epoxy. You might also do striping or patterns (like a checkerboard) by using different colors in sections. Because epoxy is poured, making crisp lines is a bit tricky, but with careful taping and planning, it’s achievable.
- Matte or Satin Finish: While epoxy is usually high-gloss, some people prefer a less reflective finish. You can achieve a matte or satin sheen by using a special topcoat (like a polyurethane with a matte additive). This can also make scratches less noticeable and reduce slipperiness slightly. It sacrifices some of the dramatic shine but can look more natural in a home interior setting.
- Terrazzo-Style Epoxy: For a decorative floor with a classic vibe, some epoxy installations use larger aggregates (like small pebbles, glass, or marble chips) mixed into a clear epoxy matrix – essentially creating a modern epoxy terrazzo. This is usually a poured professional floor, ground smooth after curing. It’s expensive, but it combines the beauty of terrazzo with the versatility of epoxy.
- Glow-in-the-Dark: A novelty option – some epoxies can have phosphorescent powders added so that the floor softly glows in the dark after being charged by light. This could be fun for a kid’s playroom or a creative commercial space.
- 3D Epoxy Floors: In some artistic installations, 3D images (like a beach scene, aquarium, or geometric illusion) are printed and laid on the floor, then covered in clear epoxy. The thick clear resin creates depth, making the image look three-dimensional. This is more common in commercial/showcase settings due to cost.
When planning an epoxy floor design, consider the space’s purpose and lighting. Lighter colors or flakes can brighten a dark area by reflecting light, whereas solid dark colors might make a space feel smaller but can hide stains well. Also, note that UV exposure can cause some epoxies to yellow over time; if the area has windows/sunlight, ask for a UV-resistant topcoat or use aliphatic urethane topcoats to protect the design.
From an aesthetic standpoint, epoxy can be very versatile – from utilitarian solid floors to elaborate art underfoot. Gather inspiration from photos and consult with an epoxy flooring specialist to see samples of the looks that are achievable within your budget.
Frequently Asked Questions
How Long Does Epoxy Flooring Take to Cure Completely?
Epoxy flooring typically takes about seven days to fully cure, achieving peak hardness. You should avoid heavy foot traffic during this period to guarantee ideal results and protect the surface from damage while it hardens.
Can Epoxy Flooring Be Installed Over Existing Floors?
Yes, you can install epoxy flooring over existing floors, as long as they’re in good shape. Just make sure you prepare the surface properly to achieve strong adhesion and a lasting finish.
Is Epoxy Flooring Slip-Resistant?
Yes, epoxy flooring can be slip-resistant. By incorporating grit additives and textured materials, it enhances traction, making it safer in wet conditions. Regular maintenance helps maintain its slip-resistant properties over time.
What Type of Flooring Can Epoxy Be Applied To?
You can apply epoxy to various flooring types, including concrete, vinyl, wood, terrazzo, metals, and even stone. Just guarantee surfaces are clean and properly prepared for the best adhesion and durability.
How Do I Fix Scratches or Damage on Epoxy Floors?
To fix scratches on epoxy floors, sand the area with fine-grit sandpaper, clean thoroughly, then apply a clear epoxy coat. For deeper scratches, use an epoxy repair kit and polish for a smooth finish.
Conclusion
Ultimately, epoxy flooring is a durable and versatile option that can enhance both residential and industrial spaces. While it comes with higher installation costs and potential slipperiness, its long lifespan and low maintenance make it a smart investment. Whether you choose to tackle the installation yourself or hire a professional, you’ll benefit from its aesthetic appeal and resilience. Consider your specific needs and preferences to decide if epoxy flooring is the right choice for you.
