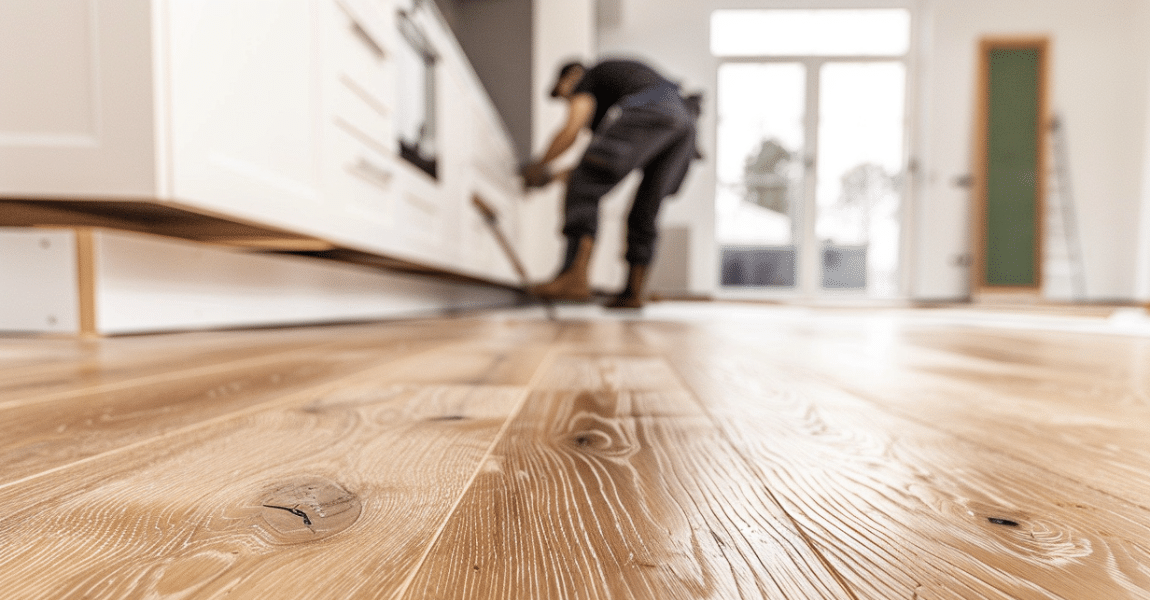
To install hardwood flooring under a toe kick, first, gather tools like a right angle drill, pull bar, and hot melt glue gun. Remove the toe kick carefully and clean the subfloor. Apply a moisture barrier to guarantee stability. Lay the hardwood, making sure of proper alignment and securing it with nails and screws. Pre-drill holes in tight spaces for trim screws. After installation, reattach the toe kick, aligning it properly and securing it with fasteners. Test for stability and cover any nail holes with putty for a seamless look. Start with these steps and you’ll achieve a polished, professional finish. Continue for detailed tips.
Gather Necessary Tools
To get started, you’ll need to gather essential tools like a right angle drill, pull bar, trim screws, and a hot melt glue gun. These tools are essential for efficiently installing hardwood flooring under the toe kick area of your cabinets.
A right angle drill is indispensable because it allows you to work in tight spaces under the toe kick, where a regular drill simply won’t fit.
The pull bar, on the other hand, is a lifesaver when it comes to aligning flooring pieces under the toe kick, ensuring a snug and seamless fit.
In situations where you can’t use a nailer, trim screws become your best friend. They’re perfect for securing the flooring without the need for cumbersome equipment.
Additionally, a hot melt glue gun can temporarily tack down the flooring while the adhesive sets, making the entire process smoother and more manageable.
Don’t forget about the PL Premium adhesive. It’s strong enough to provide a secure bond without the need for nails, making it an excellent choice for areas under the toe kick.
With these tools in hand, you’ll be well-prepared to tackle the installation process efficiently and effectively.
Remove the Toe Kick
Now that you’ve gathered your tools, start by removing the existing toe kick using a pry bar or screwdriver. Carefully detach the toe kick by unscrewing it from the cabinet or by gently prying it off. This step is important as it exposes the area underneath where you’ll be installing the hardwood flooring.
Make sure you work slowly and methodically to avoid damaging the toe kick or the cabinets. Once the toe kick is removed, you’ll have clear access to the space beneath, allowing for a seamless and professional finish when laying down the new flooring.
Keep the removed toe kick nearby, as you’ll need it later to cover any nail holes once the hardwood flooring is securely installed. This won’t only provide a polished look but also ensure the cabinets appear intact, as if the flooring was always there.
Properly removing the toe kick is essential for a successful hardwood flooring installation under kitchen cabinets. By taking this step seriously, you’ll set the stage for a smooth and efficient installation process, resulting in a stunning and cohesive floor that enhances the overall look of your kitchen.
Prepare the Subfloor
Before installing hardwood flooring under the toe kick, make sure the subfloor is clean, level, and dry.
Apply a moisture barrier to protect the hardwood from potential water damage.
These steps will guarantee a stable and long-lasting flooring installation.
Clean and Level Surface
Ensuring the subfloor is clean and level is vital for a flawless hardwood flooring installation under the toe kick. Start by thoroughly cleaning the subfloor to remove any debris, dust, or old adhesive that could interfere with the installation. Use a broom, vacuum, or even a damp mop to get the subfloor spotless.
Next, grab a level and check the subfloor for any uneven areas. Uneven surfaces can lead to gaps, creaks, and an unprofessional finish. If you find high spots, sand them down with a belt sander to make the surface even. For low spots, use a floor leveling compound to fill them in. Follow the manufacturer’s instructions for the best results and allow the compound to dry completely.
Proper subfloor preparation is essential for a seamless installation of hardwood flooring under the toe kick. By ensuring the subfloor is both clean and level, you create a stable foundation that will keep your hardwood flooring securely in place.
This step can’t be skipped, as it directly impacts the longevity and appearance of your new flooring under the kitchen cabinets.
Moisture Barrier Installation
Once the subfloor is clean and level, the next important step is to install a moisture barrier to protect your hardwood flooring from potential water damage. This step is vital for maintaining the longevity and durability of your hardwood flooring, especially under the toe kick where moisture can easily seep in.
Start by choosing the right type of moisture barrier, such as 15 lb felt paper or a specialized underlayment. These materials are designed to provide a protective layer between your subfloor and hardwood flooring, preventing moisture issues. Make sure the moisture barrier is securely attached to the subfloor to create an effective seal.
When installing the moisture barrier, ensure it’s properly aligned and covers the entire subfloor area where the hardwood flooring will be placed. Overlapping the edges of the barrier by a few inches can add extra protection against moisture seepage.
Here are a few tips to help you with the installation:
- Use a staple gun or adhesive to secure the moisture barrier to the subfloor.
- Smooth out any wrinkles or bubbles to ensure a flat surface.
- Double-check that the entire area is covered, with no gaps or exposed subfloor.
Install the Hardwood Flooring
Start by applying adhesive or glue to secure the first course of hardwood flooring under the kitchen base cabinet toe kick. This guarantees the flooring underneath the cabinets is firmly in place and prevents shifting. Using a high-quality adhesive like PL Premium can help manage those hard-to-reach areas where a nailer might be inaccessible.
Next, make sure the hardwood boards align properly with the rest of the kitchen floor. This step is essential for achieving a seamless look. Use shoe molding to hold down the flooring under the toe kick securely. This molding not only adds a finished look but also keeps the hardwood in place, preventing any unwanted movement over time.
Here’s a quick reference to the tools and materials you’ll need:
| Tools Needed | Materials Needed | Key Points |
|---|---|---|
| Adhesive (PL Premium) | Hardwood Flooring | Ensure proper alignment |
| Shoe Molding | Glue | Provides a finished look |
| Trim Screws | Nailer | Secures inaccessible areas |
Secure With Nails and Screws
Frequently, you’ll need to secure the hardwood flooring under toe kicks with nails by face nailing at a 45-degree angle for the first row. This method guarantees a tight and secure fit right from the start.
For areas where a nailer can’t reach, use trim screws in the tongue for proper fastening. A right-angle drill will be your best friend in these tight spaces, allowing you to pre-drill and install screws without hassle.
To keep everything clean and professional, follow these steps:
- Pre-drill holes: Use a right-angle drill to pre-drill holes in tight spaces.
- Use trim screws: Fasten trim screws into the tongue where a nailer can’t reach.
- Apply adhesive: Utilize PL Premium adhesive for extra security under toe kicks.
Remember to pop off the toe kick before nailing or screwing in the flooring. This way, you can use the toe kick to cover any nail holes when reattaching it for a clean finish.
Adhesive, nails, and screws combined will provide a robust bond, guaranteeing your hardwood flooring remains securely in place under those tricky toe kick areas.
Reattach the Toe Kick
Now that the flooring is in place, it’s time to reattach the toe kick. Make sure it aligns properly and use fasteners to secure it firmly.
Align Toe Kick Properly
Guaranteeing the toe kick aligns correctly with the base of the cabinets is essential for a seamless finish. Start by making sure the toe kick sits directly on top of the newly installed hardwood flooring rather than butting up against it. This not only provides a cleaner look but also helps cover any small gaps or imperfections.
To begin, pop off the toe kick carefully to access the hardwood flooring underneath. Once you’ve secured the flooring, reattach the toe kick, guaranteeing it lines up perfectly with the base of the cabinets. Double-check that it’s level and flush to avoid any uneven gaps. After aligning, you can face nail the toe kick in place, making sure the nails are inconspicuous.
Here are some key points to keep in mind:
- Alignment: Ensure the toe kick sits directly on top of the hardwood flooring.
- Leveling: Make sure it’s level and flush with the base of the cabinets.
- Face Nailing: Use face nails sparingly to secure the toe kick without making the nails obvious.
Secure With Fasteners
After confirming the toe kick aligns properly with the base of the cabinets, secure it with fasteners to guarantee a sturdy attachment. First, pop off the toe kick to prepare for reattachment.
Once the hardwood floor is securely in place, use face nails to reattach the toe kick. Drive the nails through the face of the toe kick and into the cabinets, ensuring a firm hold.
In areas where a nailer can’t reach, consider using trim screws. These can be driven through the tongue of the hardwood floor to provide extra stability. For a precise installation, pre-drill holes using a right-angle drill. This technique helps avoid splitting the wood and ensures the screws go in smoothly.
After nailing, cover the nail holes with putty to achieve a seamless and professional finish. This step not only conceals the fasteners but also adds to the overall aesthetic of your hardwood floor installation.
Check for Stability
With the hardwood flooring securely installed, reattach the toe kick to check for stability. Making sure the toe kick is properly secured not only gives your cabinets a finished look but also keeps everything in place. This step is essential to prevent any movement or shifting of the toe kick, especially as the whole floor settles.
When you reattach the toe kick, make sure it covers any nail holes from face nailing the flooring. This guarantees a clean, polished appearance without visible imperfections. Toe kicks are designed to sit on top of the flooring rather than directly against it, which also helps in covering any gaps or uneven edges.
Here are a few tips to keep in mind while reattaching the toe kick:
- Use proper fasteners: Ensure you’re using the right type of fasteners for a secure attachment.
- Check alignment: Make sure the toe kick aligns perfectly with the edges of your cabinets.
- Test for movement: Once attached, gently push and pull on the toe kick to confirm it’s stable and doesn’t shift.
Frequently Asked Questions
Do You Install Toe Kick Before or After Flooring?
You should install the flooring first and then the toe kick. This method allows for proper expansion and contraction of the hardwood, preventing issues like buckling or gaps, and guarantees a seamless shift between the cabinet base and flooring.
How Do You Install a Wooden Toe Kick?
To install a wooden toe kick, measure and cut it to size, apply construction adhesive to the back, and press it firmly against the base cabinet. Secure it with finishing nails or screws for added stability.
How to Nail Down the First Row of Hardwood Flooring?
To nail down the first row of hardwood flooring, face nail at a 45-degree angle for a secure hold. For areas a nailer can’t reach, pre-drill and use trim screws in the tongue of the flooring.
How to Install Hardwood Floors on an Uneven Subfloor?
To install hardwood floors on an uneven subfloor, first assess the levelness. Use shims or leveling compounds for significant irregularities. Consider a self-leveling underlayment or plywood subfloor for minor imperfections, ensuring a stable foundation.
Conclusion
Now that you’ve installed your hardwood flooring under the toe kick, your room looks seamless and professional.
You’ve mastered the necessary steps:
- Gathering tools,
- Removing the toe kick,
- Prepping the subfloor,
- Laying down the flooring,
- Securing it, and
- Reattaching the toe kick.
Enjoy your beautifully finished floor and the satisfaction of a job well done.
Remember, taking it one step at a time makes even the most challenging projects manageable.
Happy flooring!
